Hay cinco casos principales al encuadrar diseños en aros en EmbroideryStudio:
3Un diseño único que cabe en un único encuadre de aro.
3Un trazado grande de piezas de trabajo que involucra múltiples diseños cada uno con su propio encuadre.
3Un diseño único que cabe en un único encuadre de aro, pero que se repite continuamente.
3Un diseño único que no cabe en un único encuadre pero cabe en un aro de múltiples posiciones. Los aros multi-posición consisten generalmente de dos (2) o tres (3) áreas traslapadas de bordado.
3Un diseño único que cabe en un único encuadre y requiere múltiples encuadres.
En cada encuadre hay generalmente un solo punto de referencia importante – el centro del aro. Este es el caso en particular cuando las máquinas centran automáticamente el diseño. Cuando los diseños están ubicados en una pieza de trabajo grande, como un mantel, la extensión del diseño y el centro geométrico se vuelven importantes para el posicionamiento.
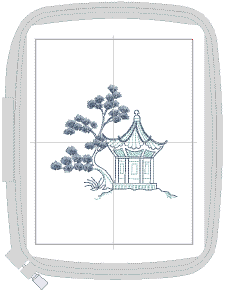
Para la mayoría de los trabajos, usará diseños que encajan en su totalidad en los aros disponibles para su máquina específica. Usará principalmente configuraciones predeterminadas tanto en el software como en la máquina. El centro del aro es el punto de referencia para todos los diseños que borda de esta manera. Esta técnica es la base de todas las otras técnicas que usará. Vea Bordar diseños únicos para más información.
El bordado continuo consiste en un único diseño repetido continuamente que cabe en un único aro.
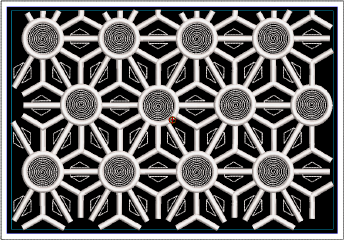
En EmbroideryStudio, el bordado continuo puede hacerse en una de dos formas:
3El bordado continuo automático consiste en múltiples repeticiones del diseño combinadas con encuadres múltiples para crear archivos de diseño con marcas de registro automáticas.
3El bordado continuo manual consiste en un único diseño con marcadores de hilván insertados manualmente o marcadores gráficos al inicio y final del diseño para la alineación.
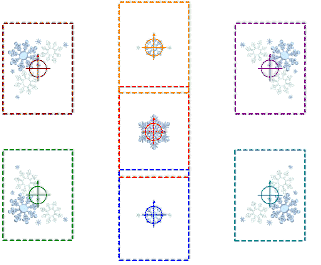
Como un usuario intermedio, puede querer crear trazados de diseño en piezas de trabajo grandes. Cada diseño encajará en un único aro pero puede haber múltiples diseños en el trazado. Cada encuadre tiene su propio punto de referencia que se usa con la plantilla de aros para posicionar con precisión el diseño con la orientación correcta. Como solo hay un diseño por encuadre, no se necesitan puntos de ubicación secundarios. . La principal ventaja de esta técnica es que el trazado completo se puede guardar en un solo archivo de diseño con la pieza de trabajo como referencia y todos los componentes incluidos. Vea Bordar trazados de piezas de trabajo para más información.
Como un usuario intermedio, sin duda querrá probar a bordar diseños más grandes en aros de múltiples posiciones. Estos aros le permitirán usar un área de tela más grande para combinar varios diseños o dividir diseños grandes. Los componentes del diseño se bordan en diferentes áreas de bordado sin necesidad de reposicionar la tela en el aro. Vea Encuadre de múltiples posiciones para más información.
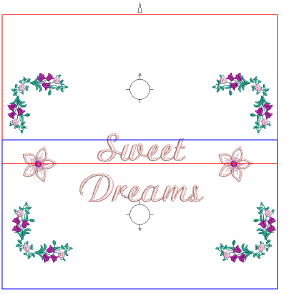
Si su bordado es muy grande o involucra una área de trabajo grande, tiene la opción de dividirlo en múltiples encuadres. La caja de herramientas Modalidad de colocaciónes de aros le permite posicionar aros estratégicamente hasta obtener el menor número de encuadres necesarios para acomodar la totalidad del trazado de diseño.
Cada encuadre contiene un objeto o grupo de objetos que pueden bordarse solos. Los encuadres de aro se bordan consecutivamente para formar el diseño completo. Se pueden enviar directamente a la máquina o guardar en un archivo. Vea Encuadres múltiples para más información.
Productos
Complementos de EmbroideryStudio
Soluciones
Aprendiendo
|
Copyright ©2025 Wilcom Pty Ltd | Condiciones de uso | Política de privacidad |