Para la mayoría de los trabajos, usará diseños que encajan en su totalidad en los aros disponibles para su máquina específica. Usará principalmente configuraciones predeterminadas tanto en el software como en la máquina. El centro del aro es el punto de referencia para todos los diseños que borda de esta manera. Esta técnica es la base de todas las otras técnicas que usará.
1Inserte o abra un diseño.
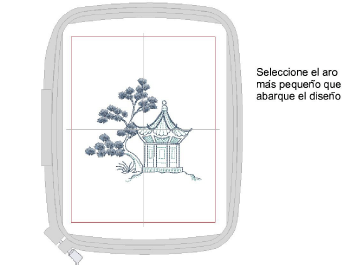
3El aro se centra automáticamente alrededor de la extensión del diseño.
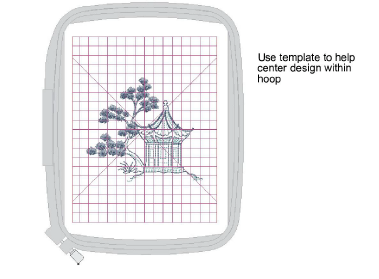
3Usando la plantilla del aro en lugar de la cuadrícula, puede asegurarse de que el centro del aro se alinee siempre con la cuadrícula de la plantilla del aro cuando el aro se centra alrededor del diseño.
2Opcionalmente, ajuste el tamaño del diseño o cambie aros que se acomoden al diseño.
3Imprima una hoja de trabajo del diseño. La hoja de trabajo puede incluir el marcador de posición del aro.
4Envíe el diseño a la máquina. El diseño se centra automáticamente en la máquina.
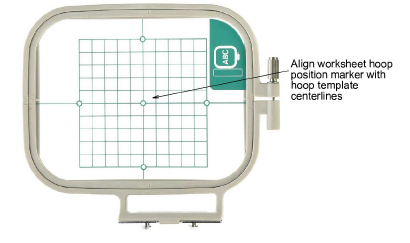
5Fije la hoja de trabajo del diseño a la tela.
6Encuadre la tela. Alinee el marcador de la posición del aro en la hoja de trabajo con las líneas de centro de la plantilla del aro.
7Ponga en marcha la máquina. La aguja se moverá al centro del aro.
8Bordar el diseño.
Productos
Complementos de EmbroideryStudio
Soluciones
Aprendiendo
|
Copyright ©2025 Wilcom Pty Ltd | Condiciones de uso | Política de privacidad |