Como un usuario intermedio, puede querer crear trazados de diseño en piezas de trabajo grandes. Cada diseño encajará en un único aro pero puede haber múltiples diseños en el trazado. Cada encuadre tiene su propio punto de referencia que se usa con la plantilla de aros para posicionar con precisión el diseño con la orientación correcta. Como solo hay un diseño por encuadre, no se necesitan puntos de ubicación secundarios. . The main benefit of this technique is that all components can be accommodated within a single design file.
1Inserte o abra un diseño. El aro se centra automáticamente alrededor de la extensión del diseño, como lo hace en la mayoría de las máquinas.
2Opcionalmente, ajuste el tamaño del diseño o cambie a un aro que se acomoden al diseño.
3Cree un trazado de diseño combinando diseños y elementos de diseño.
3Hay varias prestaciones en el software para crear trazados de diseños geométricos fácil y rápidamente – Reflejar-fusionar, Trazados, etc.
3Alternativamente, coloque los diseños manualmente.
3Opcionalmente, incluya un fondo para una prenda o una pieza de trabajo grande.
4Use encuadres múltiples para colocar aros automáticamente para cada ubicación del diseño. Puede usar la prestación automática para generar encuadres aún en trazados grandes.
Idea: Con trazados de piezas de trabajo, no necesita incluir marcas de registro, pero sí necesita marcadores de posición de aro para cada ubicación de aro. Ellos mostrarán la posición y la orientación de cada diseño en el trazado.
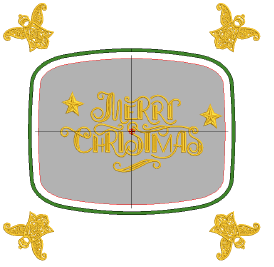
5Imprima la plantilla del trazado en la hoja de trabajo del diseño. Los trazados grandes pueden imprimirse en impresoras de formato pequeño y luego ensamblarse. Esto configura todos los aros en la relación espacial correcta.
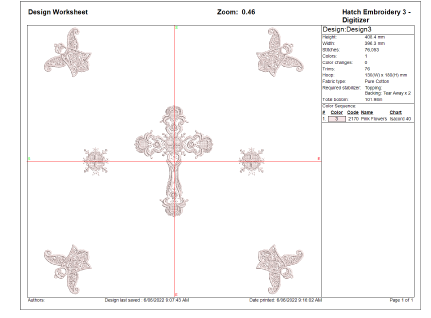
6Ensamble la hoja de trabajo del diseño para mostrar el trazado completo. La hoja de trabajo muestra el marcador de posición del aro. Cada marcador de posición de aro tiene un número que indica la secuencia de encuadres.
7Envíe el diseño a la máquina. El diseño se centra automáticamente en algunas máquinas.
8Sujete la plantilla de trazado a la pieza de trabajo. Opcionalmente, elimine las secciones no bordadas de la hoja de trabajo del diseño para facilitar el trabajo con la pieza de trabajo.
9Encuadre la pieza de trabajo usando la plantilla de trazado del diseño impresa y la plantilla del aro. Alinee el marcador de la posición del aro en la hoja de trabajo con las líneas de centro de la plantilla del aro.
10Una vez encuadrado, elimine la plantilla de trazado y borde el componente del diseño en ese encuadre.
3El número de ubicación de aro está incluido en el marcador de posición de aro.
3Cuando se envían a la maquina, a los diseños se les añade el número de ubicación de aro en el nombre del archivo de trazado de diseño.
11Bordar el diseño.
12Ubique el siguiente aro en la secuencia y repita.
3Con trazados de piezas de trabajo, no necesita incluir marcas de registro, pero sí necesita marcadores de posición de aro para cada ubicación de aro. Ellos mostrarán la posición y la orientación de cada diseño en el trazado.
3Active el marcador de posición de aro mediante Vista previa de impresión > Opciones.
3Espejear y reflejar selecciónes
3Imprimir diseños con encuadres múltiples
Productos
Complementos de EmbroideryStudio
Soluciones
Aprendiendo
|
Copyright ©2025 Wilcom Pty Ltd | Condiciones de uso | Política de privacidad |