Cuando usted crea u n diseño nuevo, éste contiene una combinación de color individual predeterminada llamada ‘Combinación de color 1’. Puede añadir un número de combinaciones de color virtualmente ilimitado al diseño usando el mismo conjunto de hilos o conjuntos diferentes. Visualice previamente los diseños en colores diferentes sobre telas diferentes. Las combinaciones de color se guardan con el archivo de diseño en el formato EMB. Pueden también guardarse en un archivo de plantilla EMT para uso en diseños futuros. No pueden, sin embargo, guardarse en archivos de máquina.
Idea: Otras configuraciones se incluyen como parte de la definición de una combinación de color – color o tela de plano de fondo, colores de visualización para los símbolos del taladro, puntadas no cosidas, objetos seleccionados, contornos de objeto y la cuadrícula.
1Abra el diseño y hage clic en el icono Editor de combinaciones de color.
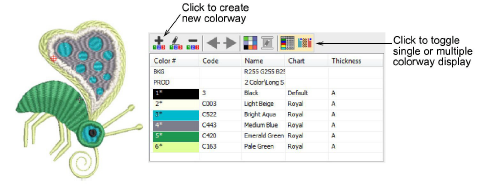
2Haga clic en el icono Crear combinación de color.
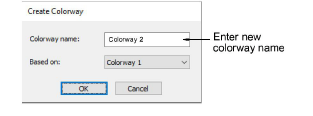
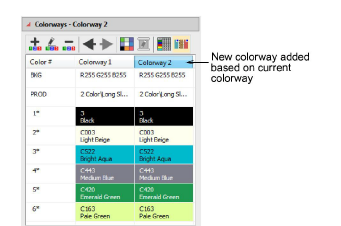
3Introduzca el nombre de la nueva combinación de color – p. ej. ‘Combinación 2’. La nueva combinación de color usará la combinación de color actual como punto de partida.
4Asigne colores desde el carta de hilos actual a las cuñas de colores seleccionados.
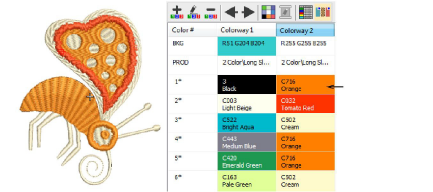
Nota: Puesto que los hilos de colores oscuros cubren las telas de colores claros mejor que al contrario, se pueden necesitar densidades diferentes al cambiar de una combinación de color a otra. Las combinaciones de color no compensan automáticamente las diferentes densidades. Estos deben ajustarse manualmente.
5Use la barra de herramientas interna para editar:
3Si usted cambia el plano de fondo en la Combinación de color 1 y guarda su plantilla, se mostrará así al empezar.
3También puede casar colores de hilo desde gráficos importados –vectores o de mapa de bits.
3Añadir y casar los colores de imagen
Productos
Complementos de EmbroideryStudio
Soluciones
Aprendiendo
|
Copyright ©2025 Wilcom Pty Ltd | Condiciones de uso | Política de privacidad |


