Las herramientas Digitalización automática tienen todo lo necesario para digitalizar formas en ilustraciones electrónicas, de mapa de bits y vector, sin usar métodos de entrada manuales. Estas herramientas son muy útiles para crear objetos de bordado a partir de imágenes escaneadas que no necesitan efectos artísticos especiales o un conocimiento específico de bordado. Si está empleando un gráfico vectoriales, éste debe incluir un color de relleno. Digitalización automática puede usarse para crear objetos de relleno Tatami ‘cerrados’, además de objetos con satín ondulante. Úselo también para crear contornos y detalles con puntada corrida. Se aplican las propiedades actuales.
1Cargue y pre-establezca las ilustraciones según sea necesario.
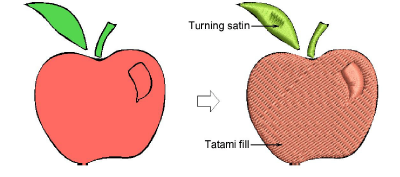
2Seleccione un método para digitalizar automáticamente los rellenos:
3Use Objeto relleno tatami con agujeros para áreas grandes, conservando los agujeros en ellas.
3Si desea que los agujeros se ignoren, use Objeto relleno tatami.
3Use Objeto satín ondulante para digitalizar formas giratorias con puntada satín.
3Haga clic en la forma que desea digitalizar. Se generan las puntadas según las configuraciones actuales.
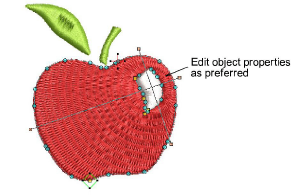
4Opcionalmente, edite las propiedades de los objetos, incluyendo los colores, ángulos de puntada, puntos de entrada y salida, etc.
1Seleccione un método de digitalizar automáticamente los contornos
3Use Objeto de corrido de línea central para crear líneas centrales en formas estrechas con puntadas de corrido.
3Use Objeto de corrido contorno para crear contornos de puntada corrida.
2Haga clic de nuevo en la forma que desea digitalizar. Se generan las puntadas según las configuraciones actuales de puntada.
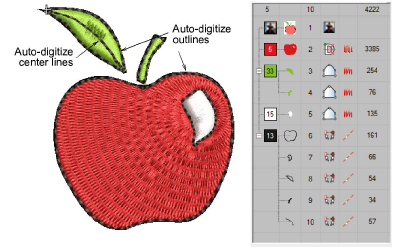
3Edite el resultado como prefiera – p.ej. cambie los colores, cambie los tipos de puntada, elimine cualquier bordado de fondo no deseado, etc.
3Use Lista color-objeto y/o la barra de Secuenciar para optimizar la secuencia de puntadas sus objetos digitalizados automáticamente.
3Use Unión más cercana y/o la herramienta Reformar para minimizar los conectores.
3Active o desactive los refuerzos con el botón Refuerzo automático.
3Cargar y preestablecer ilustraciones
3Recortar imágenes de mapa de bits
3Preparar ilustraciones para la digitalización automática
3Secuenciar los objetos de bordado
3Fusionar objetos vectoriales y objetos de bordado
Productos
Complementos de EmbroideryStudio
Soluciones
Aprendiendo
|
Copyright ©2025 Wilcom Pty Ltd | Condiciones de uso | Política de privacidad |


