Antes de usar imágenes de mapa de bits para diseño, recórtelas para eliminar todos los detalles innecesarios y ahorrarse tiempo de procesamiento. EmbroideryStudio le permite ‘recortar suave’ las imágenes, lo cual quiere decir que puede reformar o retirar áreas de recorte en cualquier momento.
1Escanee o cargue la foto que desea usar. Use imágenes con temas bien definidos o tonos que varíen constantemente para obtener resultados óptimos. Vea Cargar ilustraciones de mapa de bits para más información.
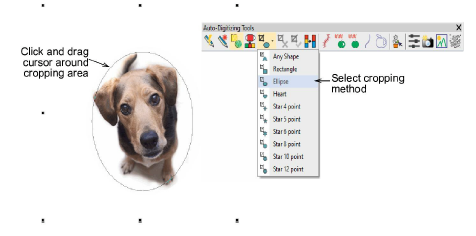
2Seleccione la imagen y escoja una herramienta para recortar en la lista desplegable Recortar mapa de bits. Las mismas opciones están disponibles en el menú Gráfico.
3Haga clic y arrastre el cursor alrededor del área a recortar.
4Reforme o transforme la forma de recorte con la herramienta Reformar.
3Para reposicionar el área de recorte, haga clic y arrastre la manija en forma de rombo.

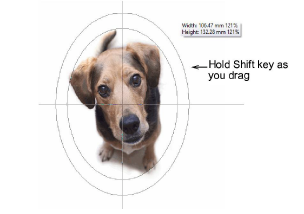
3Para redimensionar el área de recorte, haga clic y arrastre las manijas de redimensionamiento triangulares. Para centrar la operación de redimensionamiento alrededor del punto de anclaje, sostenga la tecla Mayús mientras arrastra.
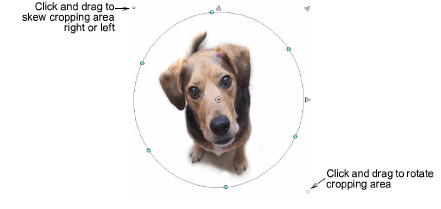
3Para rotar o sesgar el área de recorte, haga clic y arrastre los puntos de control en las esquinas superior izquierda e inferior derecha.
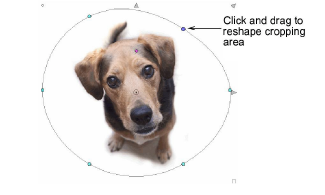
3Haga clic y arrastre los nodos de reforma para reformar el área de recorte.
5Alternativamente, utilice el método Cualquier forma para digitalizar una forma de recorte.
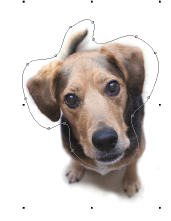
3Haga clic en Seleccionar objeto o presione Esc para cerrar.
3Haga clic en Eliminar recorte para eliminar un área de recorte aplicada a la ilustración seleccionada.
3Haga clic en la herramienta Finalizar recorte para recortar una imagen a sus nuevas extensiones visibles.
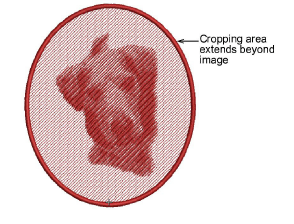
3El fondo puede sobre-dimensionarse para acomodar un área de recorte que se extienda más allá de la imagen misma. Esto es útil en las operaciones de FotoPuntada.
3Cuando usted crea un área de recorte, se considera ‘temporal’ y puede reformarla a voluntad. Al usar el comando Finalizar recorte, hace el recorte permanente. La única forma de devolverse es mediante el comando Deshacer o reinsertando el mapa de bits original.
3Insertar imágenes de mapa de bits
3Digitalización automática con FotoPuntada
Productos
Complementos de EmbroideryStudio
Soluciones
Aprendiendo
|
Copyright ©2025 Wilcom Pty Ltd | Condiciones de uso | Política de privacidad |


