
Use Docker > Multi Blend to add, edit, and reorder layers while keeping objects intact.
|
|
Use Docker > Multi Blend to add, edit, and reorder layers while keeping objects intact. |
With the Multi Blend tool, you can create multiple layers of stitching using any combination of stitch types, fill styles, and special effects. Add as many layers as needed to achieve the required tonal depth or gradient.
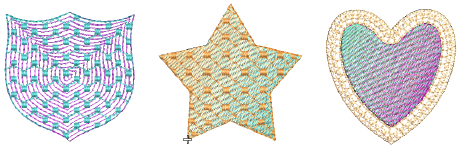
Unlike earlier blending tools that required breaking objects apart for editing, Multi Blend allows you to manage every layer as part of a unified, compound object. Each layer can be adjusted individually, reordered, or restyled without compromising object integrity.
To streamline your workflow, you can save your preferred settings as profiles and reapply them to new objects. Profiles can include selected colors, fill types, and effects – offering consistency, speed, and creative control across your designs.
1Click Docker > Multi Blend to open the docker.
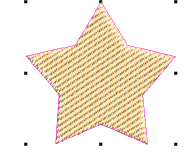
2Select a suitable object – e.g. Complex Fill, Column A/B, or Column C object with tatami fill.
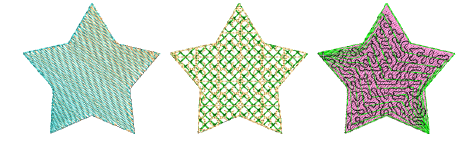
3In the Profiles panel, choose a preset and click Apply. This may be one of the defaults or a custom profile. It may include two, three, or more layers.
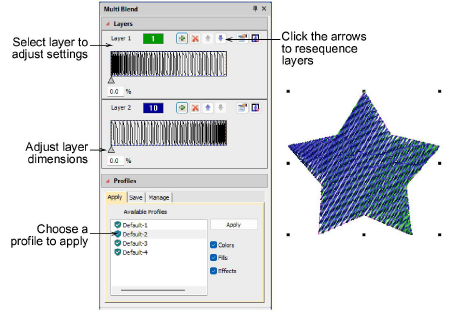
4Use the Layers panel to select individual layers and adjust properties and applied effects. The Layers panel works in combination with Object Properties and Color-Object List as well as Color toolbar.
5Use the available controls to:
3Add or delete layers.
3Resequence layers.
3Adjust layer dimensions with the slider controls.

6Save effective combinations as profiles for reuse in future designs. Go to the Save tab, enter a name, and click Save.
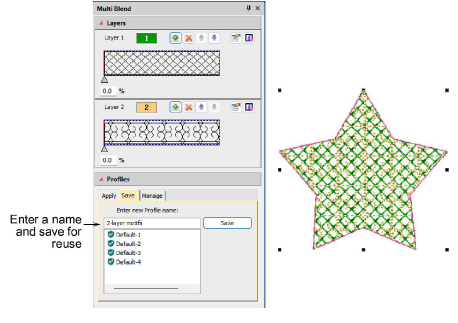
7The same profile can be applied to other objects using any combination of colors, fills, and/or effects. Select an object, choose the profile, and click Apply.

3Keep Auto Underlay turned off unless specifically needed for structure.
3Use Trapunto to prevent travel runs showing through open stitching.
3Remove or rename custom profiles via the Manage tab.

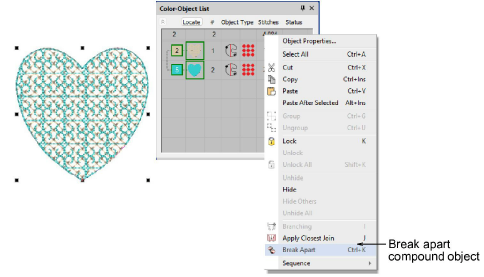
3Study the object in the Color-Object List. It is selectable as a single compound object. Use Break Apart to access the layers as separate objects.
Products
EmbroideryStudio Add-ons
Solutions
Learning
Support
Connect
About Wilcom