Color blends
From sunsets to wood grains, Multi Blend creates interesting color blends. Use it with standard tatami to create depth and shading. Two or more colors are merged smoothly from one to another using a mixture of dense and open fill.
The effect is generally applied to Complex Fill objects. But curved blends can be created with Column A/B or Column C objects. Objects can be resized, rotated and skewed without losing the color blending effect.
To create a color blend...
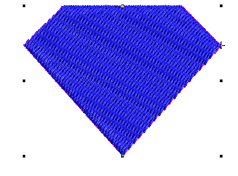
1Select a suitable object – e.g. Complex Fill (Tatami) or Column A/B.
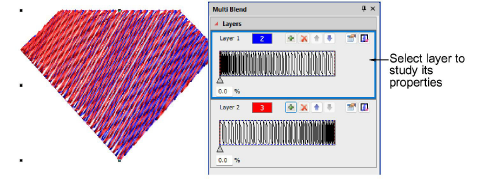
2Click the Multi Blend icon in the Toolbox. A default effect is immediately applied and the Multi Blend docker opens. The docker shows the current profile in the Layers panel – usually a two-layer blend showing a smooth color transition between two layers.
3Select the first layer in the top panel and right-click the Accordion Spacing icon to access its properties.
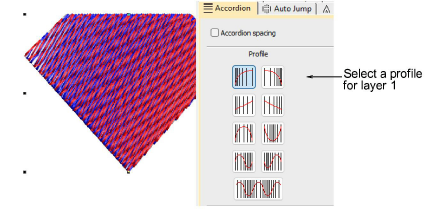
4Click the buttons to experiment with different accordion profiles – e.g. Linear, Exponential, Concave, Convex. The effect is applied immediately to the selected layer.
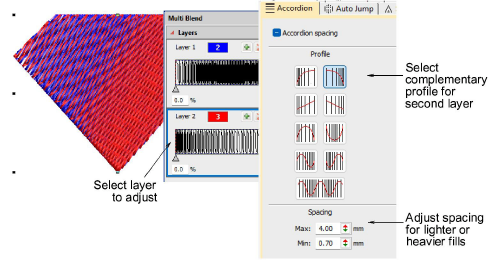
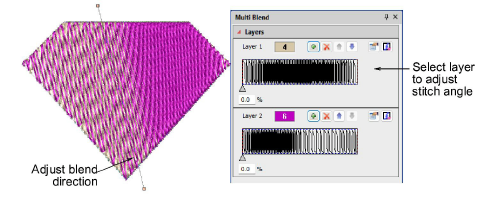
5Select the second layer in the Multi Blend docker and choose a complementary profile in the Accordion tab. Generally you will want to use opposites but you can also mix and match completely different profiles.
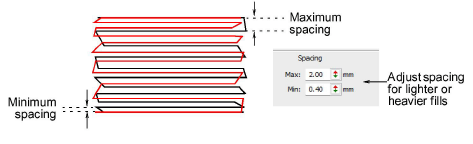
6Choose complementary colors for each layer from the Color toolbar. Adjust spacing settings in the Accordion tab. Generally, you will want to use the same values so that rows blend into one another.
7Deselect layers by clicking away and reselecting the object.
8In Reshape mode, adjust the blend direction of the combined layers. Alternatively, adjust each layer individually, first selecting it in the docker.
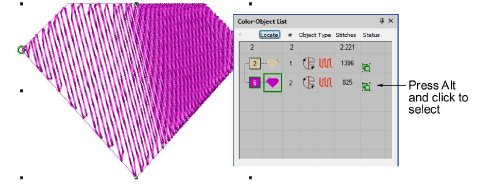
9Study the object in the Color-Object List. The layers appear as a grouped object. Holding down the Alt key, click a layer to select. Use the Locate button to isolate.
Usage tips...
3Make further adjustments as required. All object properties and effects are available for each layer.
3Adjust blend direction of the whole object or selected layers with the Reshape tool.
3To reduce moiré patterns, slightly adjust row spacings or angle between layers.
3To prevent underlay stitching from showing through, Auto Underlay is deselected by default and Trapunto effect applied.
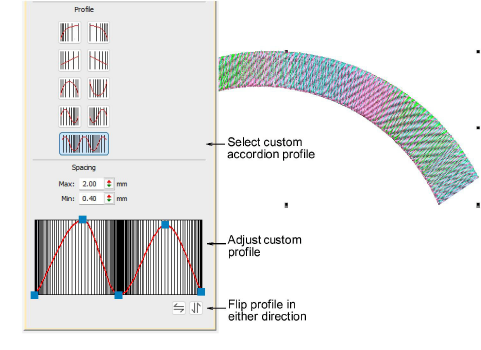
3Use the Custom profile to create complex tonal transitions or texture variations.
3Use the Flip buttons to create complementary profiles for different layers.
Related topics...
3Stabilizing with underlays
3Trapunto effect
3Accordion fills