Con EmbroideryStudio, el refuerzo automático se aplica usualmente objeto por objeto. Las configuraciones por defecto se determinan en función del tamaño y la forma del objeto y la tela automático actual. A veces, sin embargo, puede desear aplicar un refuerzo global a un grupo de objetos. Aquí vemos como usar Contornos y desplazamientos con el tipo de puntada Aplanar para crear un refuerzo global.
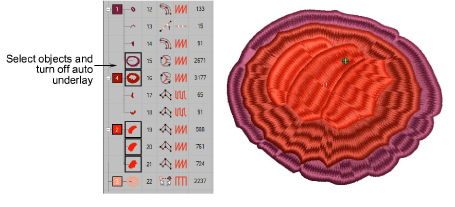
1Seleccione los objetos y haga clic en Refuerzo automático para desactivar el refuerzo automático.
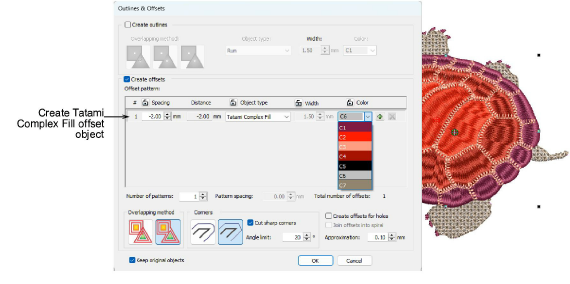
2Use Contornos y desplazamientos para crear un Objeto de relleno complejo, desplazado, digamos, -2 mm. Elija el color que desea usar para el refuerzo.
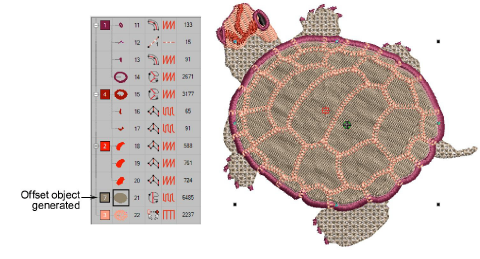
3Haga clic en Aceptar para generarlo. Se genera un objeto desplazado para estos objetos y se coloca después de ellos en la secuencia de bordado.
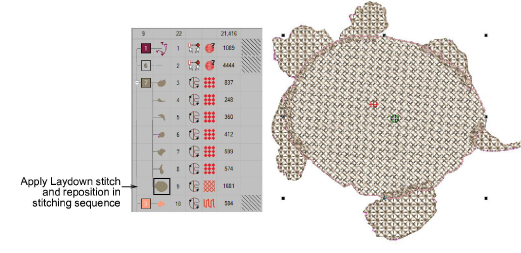
4Apliqué tipo de puntada Aplanar y reposicione el refuerzo en la secuencia de bordado.
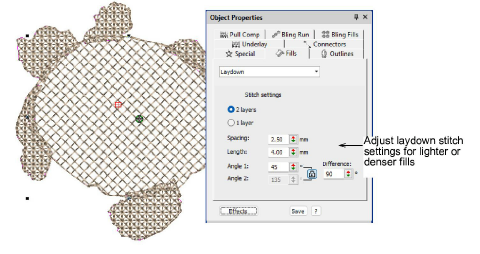
5Haga doble clic para acceder a las propiedades del objeto y ajústelas como necesite.
Las propiedades del objeto son las mismas que las configuraciones de puntada disponibles en el panel de diálogo Puntada aplanada. Ajuste la densidad para pelusas más livianas o pesadas. En rellenos con dos capas, los ángulos de puntada predeterminados están predeterminados a 90° (perpendiculares) el uno al otro. Ajuste como prefiera.
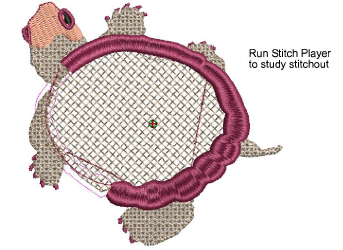
6Apliqué unión más cercana y corra Simulador de puntada para estudiar el bordado.
3Simular el bordado del diseño
3Generar contornos y deplazamientos
Productos
Complementos de EmbroideryStudio
Soluciones
Aprendiendo
|
Copyright ©2025 Wilcom Pty Ltd | Condiciones de uso | Política de privacidad |


