|
|
Use Organizar > Aplicar unión más cercana para (re)aplicar la unión más cercana después de editar. |
Cuando usted está digitalizando objetos cerrados, el método Unión más cercana calcula de forma automática la unión más cercana entre ellos, ahorrándole tener que considerar puntos de entrada y salida. La prestación Aplicar unión más cercana permite (re)aplicar la unión más cercana a los objetos después de la edición. Se puede acceder al comando mediante:
3El botón Organizar de la barra de herramientas
3Menú Organizar
3El menú desplegable de la ventana de diseño
3Menú desplegable de Lista color-objeto
3Tecla de atajo (J)
Nota: El comando Aplicar unión más cercana se encuentra activado sólo cuando dos o más objetos de bordado están seleccionados.
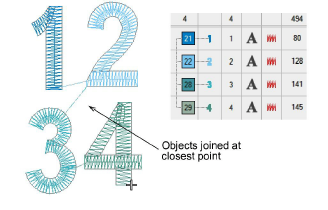
3Digitalice los objetos de bordado como requiera.
Si el método Unión más cercana ha sido activado por medio del panel acoplable Configuración (o barra de herramientas Estándar) > Opciones > General, los puntos de entrada y salida se unen automáticamente en el punto más cercano.
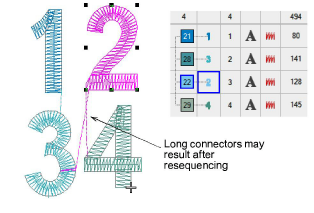
3Mueva, reforme, y/o vuelva a secuenciar los objetos en un diseño como requiera.
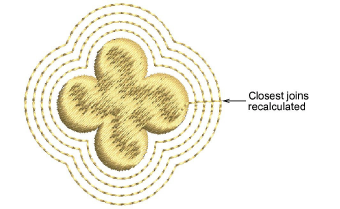
La unión más cercana no se vuelve a calcular automáticamente – se pueden obtener conectores largos.
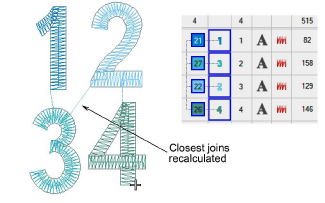
3Seleccione todos los objetos de una secuencia y vuelva a aplicar la unión más cercana – haga clic en Aplicar unión más cercana o escoja el comando del menú desplegable.
Los objetos de bordado seleccionados se regeneran si se aplica Unión más cercana.
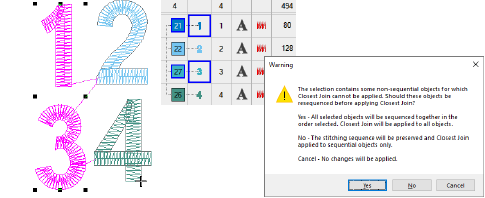
Advertencia: Todos los objetos de bordado no secuenciales en una selección causarán que se muestre el siguiente mensaje:
Idea: Apliqué tambiénUnión más cercana a los objetos desplazados generados.
3Generar contornos y deplazamientos
Productos
Complementos de EmbroideryStudio
Soluciones
Aprendiendo
|
Copyright ©2025 Wilcom Pty Ltd | Condiciones de uso | Política de privacidad |
