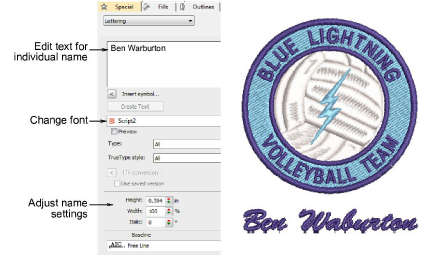
Puede previsualizar cómo se bordarán los nombres de equipo individuales. Añada nombres, elimine nombres, ordene listas de nombres de equipo, cambie las propiedades de algunos de los nombres de equipo. Establezca las propiedades tales como fuente, tamaño o color para cada nombre. También se pueden establecer las propiedades de una columna entera de nombres.

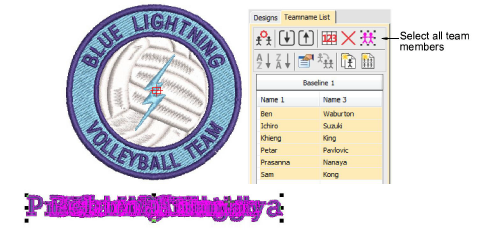
1Abra un diseño de nombres de equipo y haga clic en el icono Nombres de equipo. Por defecto, se seleccionan todos los nombres.
2Ajuste la posición del grupo de nombres de equipo como presice.

3Vea los nombres de equipo de alguna de las siguientes maneras:
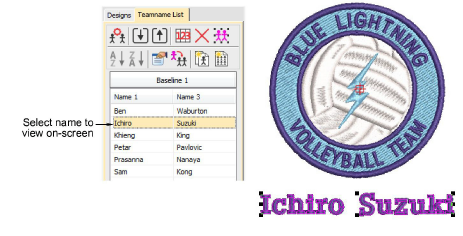
3Seleccione un nombre.
3Use las teclas de flechas para desplazarse arriba y abajo por la lista para visualizar cada uno de los nombres.
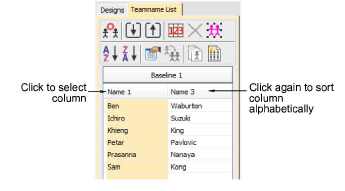
4Haga clic sobre el encabezamiento de la lista para seleccionar una columna de nombres – use los botones Ordenar para ordenar las listas en orden alfabético descendiente o ascendiente.
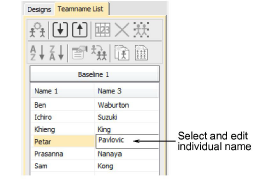
5Haga clic en una celda para seleccionar un nombre individual en la Lista de nombres de equipo.
6Edite en pantalla los nombres seleccionados como editaría cualquier otro objeto de letras – p,ej., ajuste el interletraje.
7Ajuste la línea de base de las letras tal como lo haría con otro objeto de letras. Por ejemplo, seleccione un estilo de ‘marco automático’ para líneas de base de línea fija.
8Use las herramientas de la Lista de nombres de equipo para añadir nombres, eliminar nombres, cambiar las propiedades, como precise:
|
Herramienta |
Función |
|
|
|
Administrar equipos |
Administrar equipos y miembros de equipo para uso futuro. |
|
|
Eliminar las hileras seleccionadas o la lista completa de miembros. |
|
|
|
Seleccionar toda la lista de miembros para modificación o posicionamiento. |
|
|
|
Ordenar la columna seleccionada en forma ascendente o descendente. |
|
|
|
||
|
|
Editar las propiedades de las hileras o columnas seleccionadas, o de todos los miembros de la lista. |
|
|
|
Copiar las propiedades de un miembro de equipo a todos los miembros. |
|
|
|
Crear diseños individuales para cada miembro. |
|
|
|
Crear una matriz de todos las diseños de nombres de equipo, en la secuencia apropiada para un bordado eficiente. Véase más adelante. |
|
9Para ver y/o editar las propiedades de los miembros, haga clic en Propiedades del objeto.
Idea: Por predeterminación un espacio se inserta entre los nombres. Para eliminar este espacio, establezca el valor de Espaciado de palabra en el diálogo Esquema en 0%.
3Crear diseños de nombres de equipo sencillos
3Ajuste configuraciones de espaciado
3Ajustar las configuraciones de líneas de base con anchura fija
Productos
Complementos de EmbroideryStudio
Soluciones
Aprendiendo
|
Copyright ©2025 Wilcom Pty Ltd | Condiciones de uso | Política de privacidad |


