|
|
Use Reformar > Reformar objeto para reformar las líneas de base de letras. |
Las líneas de base pueden ser ajustadas con la herramienta Reformar objeto. Dependiendo del tipo de línea de base, puede ajustar ángulos, longitudes y tamaños. Puede cambiar los radios de las curvas y los puntos de justificación. Puede reformar completamente las líneas de base Cualquier forma.

1Seleccione el objeto de letras y haga clic en el icono Reformar objeto.

Idea: El rombo grande y la cruz representan los puntos de inicio y final. Ocúltelos para acceder al los controles de la línea de base.
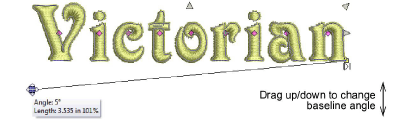
2Cambie los ángulos de las líneas de base rectas arrastrando los puntos de control cuadrados en uno de los dos extremos.
3Cree una línea de base en arco a partir de una circular arrastrando el punto de control cuadrado hueco.
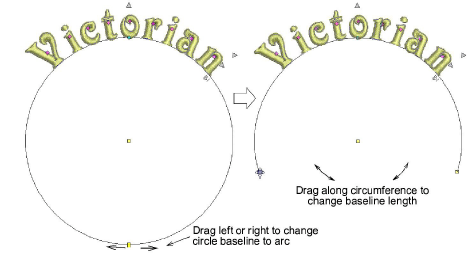
4Cambie la orientación de las letras de las líneas de base de arco arrastrando los puntos de control cuadrados macizos en uno de los extremos.
Idea: Las posiciones de las letras dependen de la justificación – justificado izquierda, centrado o derecha. Si la línea de base se vuelve demasiado corta, las letras pueden traslaparse.
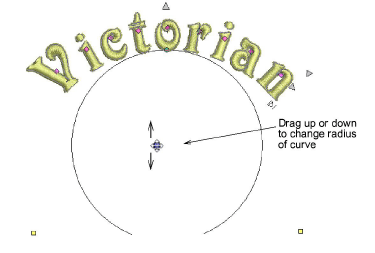
5Cambie el radio de las líneas de base curvas arrastrando el punto de control cuadrado en el centro del círculo.
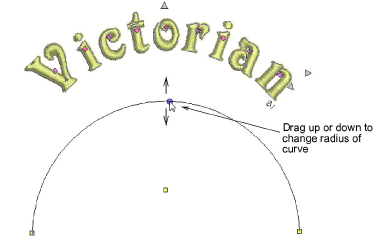
Alternativamente, cambie el radio arrastrando el punto de control en el centro de la línea de base.
6Ajuste las líneas de base Cualquier forma añadiendo, eliminando, cambiando o moviendo puntos de referencia como con cualquier objeto de bordado.
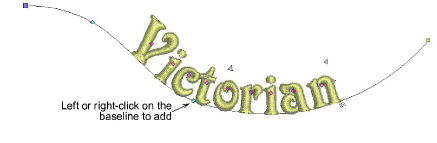
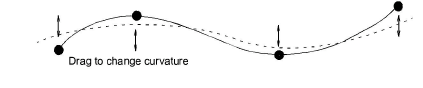
3Para reformar, haga clic con el botón izquierdo para doblar la línea en un ángulo, con el botón derecho para doblar la línea hasta una curva.
3Para volver a posicionarla, arrastre cualquiera de los puntos de control de línea de base hacia arriba o hacia abajo.
3Para eliminar, seleccione un punto de control y pulse Supr.
3Para cambiar de recta a curva, o de curva a recta, seleccione el punto de control y pulse la Barra espaciadora.
7Pulse Esc para terminar.
3Ajustar las configuraciones de líneas de base con anchura fija
3Ajustar las configuraciones de líneas de base curvas
Productos
Complementos de EmbroideryStudio
Soluciones
Aprendiendo
|
Copyright ©2025 Wilcom Pty Ltd | Condiciones de uso | Política de privacidad |
