|
|
Use Puntadas de relleno > Relleno de laberinto para crear puntadas en forma de laberinto que sigan los contornos de objetos para rellenos abiertos. Haga clic derecho para configuración. |
|
|
Use Puntadas de relleno > Relleno de laberinto para crear puntadas en forma de laberinto que sigan los contornos de objetos para rellenos abiertos. Haga clic derecho para configuración. |
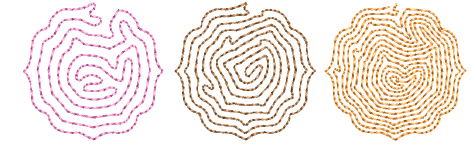
Rellene automáticamente grandes áreas con bordado de doble espiral que nunca se cruza con Relleno de laberinto.
1Elija el objeto al que desea aplicar la puntada o activar antes de comenzar a digitalizar. Los ángulos de puntada no tienen efecto en este tipo de puntada.
2Haga clic en el icono Relleno de laberinto. El efecto se aplica en base a las configuraciones actuales.
3Haga clic derecho en el icono Relleno de laberinto para acceder a las propiedades del objeto.
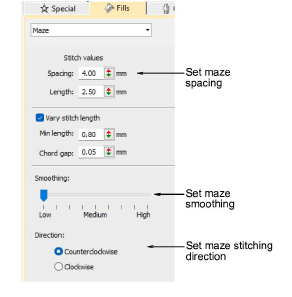
4Para definir una longitud de puntada nominal, ajuste el campo Longitud. Acorte de forma automática las puntadas para poder seguir curvas cerradas, con la opción Longitud variable de corrido. Debido a que este tipo de relleno crea puntadas en doble espiral, estas configuraciones son esencialmente los mismos que puntadas Corrido.
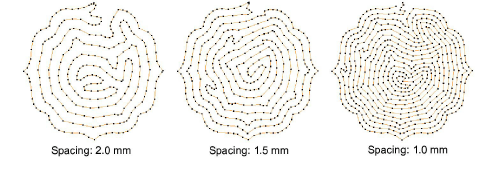
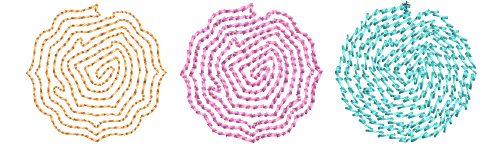
3Ajuste el Espaciado para crear bordado más o menos abierto.
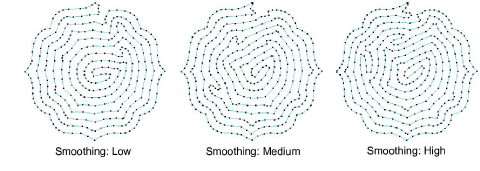
3Ajuste el Suavizado para curvas más o menos uniformes.
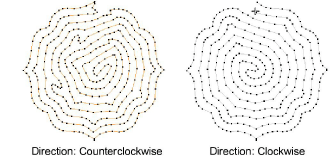
3Ajuste la Dirección para invertir la dirección de la puntada.
Idea: El Relleno de laberinto utiliza un solo corrido de puntadas para el relleno. Si desea un tipo de puntada más grueso, utilice Fragmentar para convertir el objeto en un contorno y, a continuación, aplique un tipo de puntada diferente.
3Digitalizar contornos y detalles
Productos
Complementos de EmbroideryStudio
Soluciones
Aprendiendo
|
Copyright ©2025 Wilcom Pty Ltd | Condiciones de uso | Política de privacidad |
