Ajuste la longitud de puntada, el espaciado y la fracción de desplazamiento de los rellenos Relleno curvado.
3Haga clic derecho en el icono Relleno curvado para acceder a propiedades del objeto.
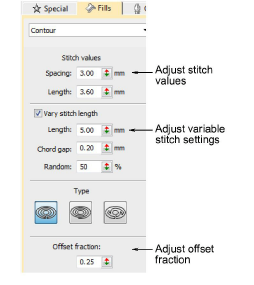
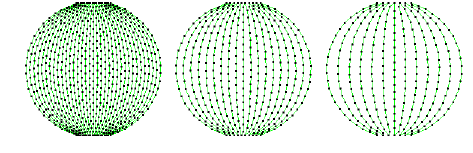
3La configuración Espaciado tiene el efecto más visible en los rellenos curvados. Úselo para ajustar entre rellenos densos y más abiertos. El valor de espaciado establece la parte más ancha de la forma. A medida que se estrecha la forma, el espaciado disminuye.
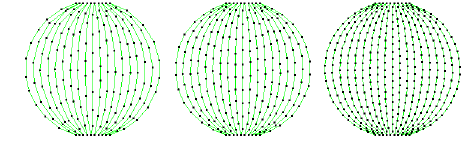
3Si bien no tiene un efecto visible en la apariencia del relleno, el ajuste Longitud ayuda a distribuir las puntadas de manera uniforme en toda la forma.
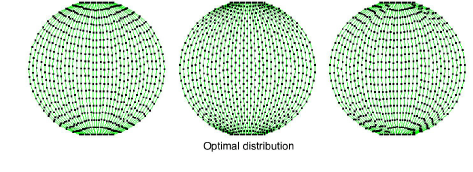
3La Fracción de desplazamiento controla el modelo de las penetraciones de aguja para conseguir una distribución uniforme de las puntadas e impedir que las penetraciones de agujas formen líneas no deseadas. Pruebe diferentes configuraciones para encontrar la distribución óptima de los puntos de la aguja.
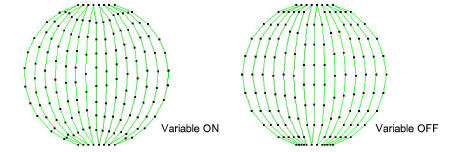
3Active Variar longitud de puntada como prefiera. La longitud de la puntada se ajusta automáticamente en las esquinas para curvas más uniformes. La configuración es la misma que las puntadas de corrido simples.
3Configuraciones de longitud de puntada
Productos
Complementos de EmbroideryStudio
Soluciones
Aprendiendo
|
Copyright ©2025 Wilcom Pty Ltd | Condiciones de uso | Política de privacidad |

