|
|
Use Panel acoplable > Propiedades del objeto para activar y desactivar el panel Propiedades del objeto. Úselo para seleccionar colores para los contornos y rellenos de objetos vectoriales. |
|
|
Use Panel acoplable > Propiedades del objeto para activar y desactivar el panel Propiedades del objeto. Úselo para seleccionar colores para los contornos y rellenos de objetos vectoriales. |
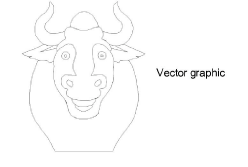
EmbroideryStudio le permite seleccionar colores para contornos y rellenos. Al colorear un objeto vectoriales, interpretarlo se hace mucho más sencillo. Por ejemplo, un color sólido de relleno podría sugerir Satín o Tatami, mientras que un patrón de relleno puede ser interpretado como Relleno de motivo o como División de programa.
1Inserte o cree un gráfico vectoriales.
2Desagrupe los objetos vectoriales tal como sea necesario.
3Seleccione un objeto vectoriales, haga clic con el botón derecho y seleccione Propiedades desde el menú desplegable. Se abrirá el panel acoplable Propiedades del objeto.
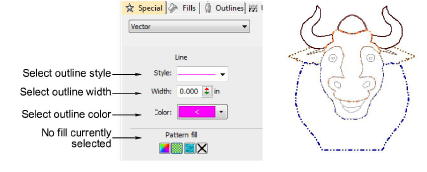
4Para cambiar el color del contorno del objeto seleccionado, ajuste las configuraciones en el panel Línea:
3Seleccione un estilo de contorno de la lista Estilo.
3Seleccione una anchura de contorno en el campo Anchura.
3Haga clic en Color y seleccione un color de contorno desde el diálogo Color.
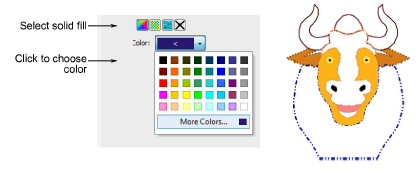
5Para rellenar el objeto seleccionado con un color sólido, seleccione el icono Relleno sólido y haga clic en la lista desplegable Color para acceder al los colores.
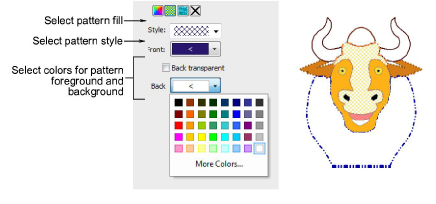
6Para rellenar el objeto seleccionado con un relleno de patrón, seleccione el icono Relleno de patrón y ajuste las configuraciones:
3Seleccione un estilo de patrón de la lista.
3Seleccione un color de primer plano a través del botón Frente.
3Haga el plano de fondo transparente si lo requiere o escoja un color a través del botón Detrás.
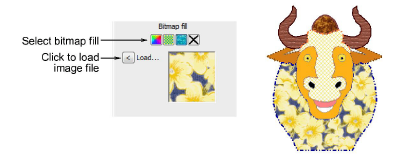
7Para rellenar el objeto seleccionado con un mapa de bits – p.ej. una textura de tela – seleccione el icono Relleno de mapa de bits y haga clic en el botón Cargar para insertar un archivo de imagen a través del diálogo Abrir.
Nota: Para ver los cambios en la hoja de trabajo de producción, seleccione Archivo > Vista previa de impresión. En la pestaña Opciones > Diseño seleccione la casilla Vectores.
3Insertar gráficos vectoriales
3Personalizar reportes de diseño
Productos
Complementos de EmbroideryStudio
Soluciones
Aprendiendo
|
Copyright ©2025 Wilcom Pty Ltd | Condiciones de uso | Política de privacidad |
