Depending on the type of work you are doing, you may choose to use a single borer depth for the entire design, or you may want to vary borer depths for different sized holes. The smaller the value, the smaller the borer depth, and hence the smaller the hole.
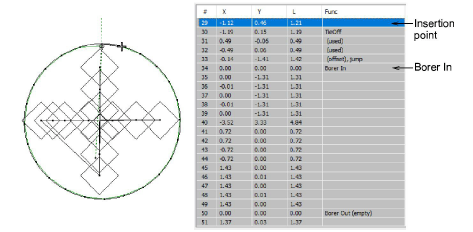
1Open the Stitch List and locate the point in the stitch sequence where you want to insert the Borer Depth function. Alternatively, use the travel functions to locate the insertion point. Choose a stitch anywhere before the Borer In function.
Tip: Although EmbroideryStudio automatically handles physical Borer Minus and Borer Plus functions at final encoding, it is good practice to insert Borer Depth changes a few stitches before or after Borer In/Out functions. See Logical vs physical borer depth for details.
2Select the required value from the Borer Depth droplist on the Schiffli toolbar. This will be interpreted as 1-13 for Plauen and 0-12 for Saurer.
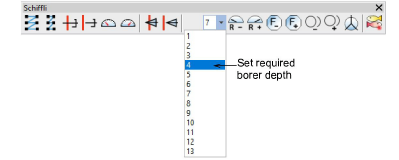
Note: A zero value for Saurer cannot be entered. If you use it, you will need to change the starting borer depth of the machine values.
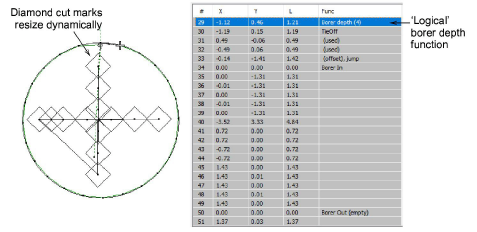
The new value appears in the Stitch List as a Borer Depth ‘logical’ function...
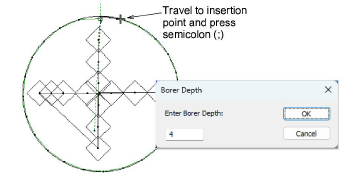
Tip: Another method to insert borer depth changes is to travel to the insertion point and press the hot key ; (semicolon) to open the Borer Depth dialog.
Tip: Stitch shortening should be turned off for both Zigzag and covering Satin.
|
Copyright ©2024 Wilcom Pty Ltd | Terms of Use | Privacy Policy |

