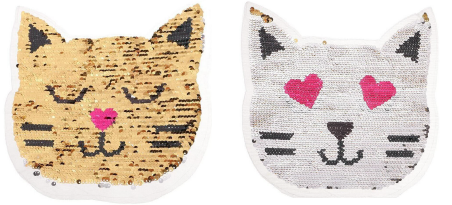
Reversible or ‘flip’ sequins are used to create color-changing effects. Flip sequins have found a wide variety of applications, from reversible sequin shirts, children’s wear, pillow cases, bags, cases, note books, and more. They have also found their way into high fashion. Their use is simple – swipe up or down to reveal the reverse side with sometimes surprising effects.
Tip: Multi-sequin machines can create flip sequins with twin patterns, one on either side. This can be achieved with a Dahao control panel and multi-sequin device.
1Choose a suitable machine format – e.g. Tajima TBF.
2Set up your sequin palette in the Sequin Palette Editor and define reverse colors for each sequin.

3Choose ‘offset circle’ as your sequin type. This makes it possible to flip the sequins.
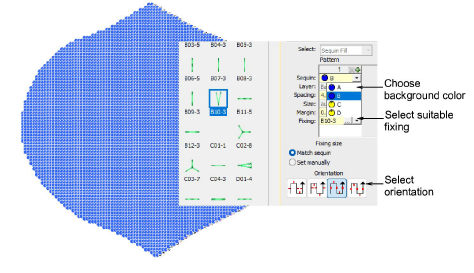
4Create a background fill and choose a background color.
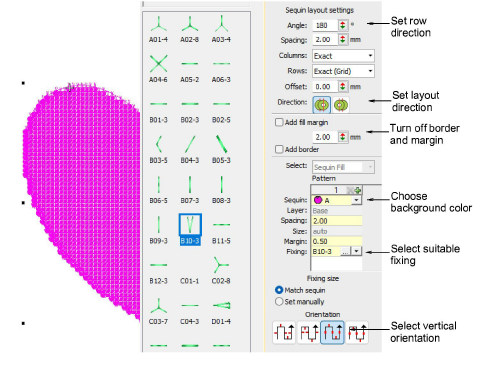
5Choose a suitable fixing stitch. EmbroideryStudio supports ‘V’ type fixings for flip sequin work.
6Choose a thread color for your sequin fill. Transparent thread is often used on the machine to avoid differences between thread color and sequin color.
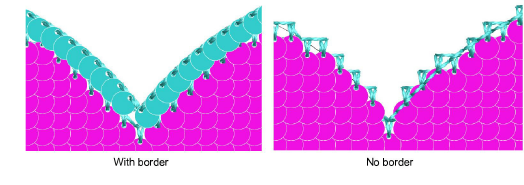
7Turn off border and margin settings. Flip-sequin fills cannot include a border.
8Set the flip-sequin direction. Indicative settings are:
|
Setting |
Bottom-Top |
Left-Right |
|
Layout angle |
180° |
-90° |
|
Layout direction |
Left-to-right |
Right-to-left |
|
Fixing orientation |
Vertical |
Left |
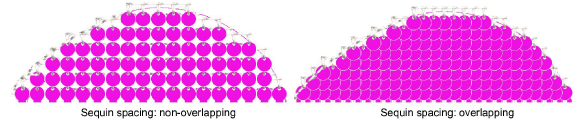
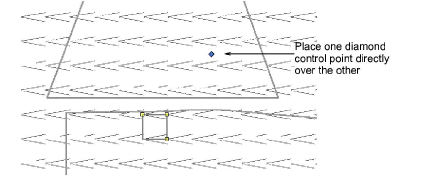
9Adjust row and column spacings as necessary. Use exact row and column spacings and set the offset to ‘0’. Otherwise patterns may distort.
10Run Stitch Player to visualize exactly how fixing stitches and sequins will be placed on the machine.
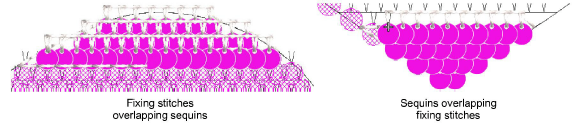
Tip: If necessary, toggle sequin layout direction. Sequins must overlap each row of fixing stitches. Not vice versa.
1With the Carving Stamp tool, select a pre-defined pattern from the library or digitize your own.
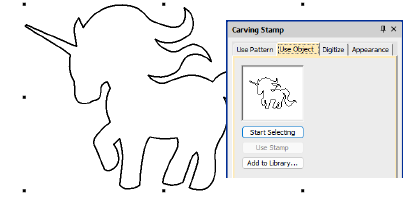
2Use the pattern as a stamp and apply it to your sequin fill background.
Tip: Turn off TrueView and Show Functions buttons to view the stamp outline on the sequin fill.
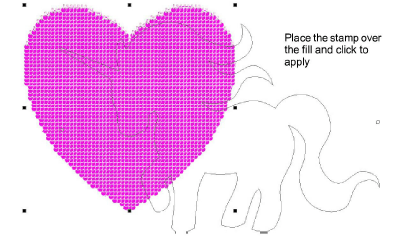
3Place the stamp pattern as follows:
Click a start point.
Hold down Shift to resize.
Hold down Ctrl to constrain orientation to 15° increments.
Click to apply.
Press Esc to exit.
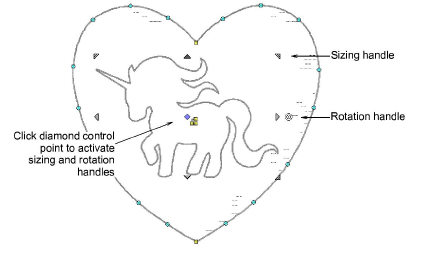
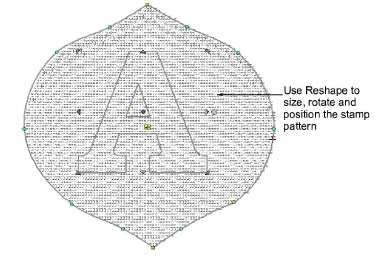
4Use the Reshape tool to size, rotate and position the stamp pattern. Click the diamond control point to activate sizing and rotation handles.
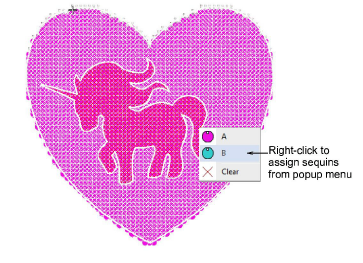
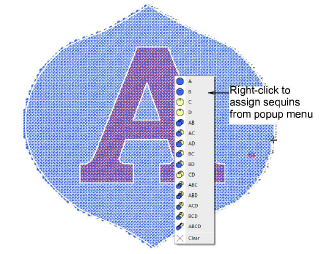
5Select the sequin fill and activate the Sequin Split Edit tool. Click the area and right-click to invoke the sequin menu. Select the color you want.
6Click the Flip Sequins toggle to view reverse sequins as they will appear in stitchout.
1Choose a suitable machine format – e.g. Dahao.
2Set up your palette in the Sequin Palette Editor and define reverse colors for each sequin. The palette must include all combinations of colors for both sides.
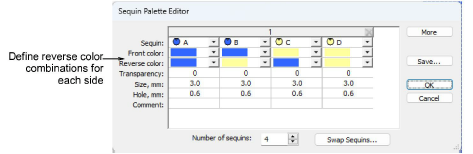
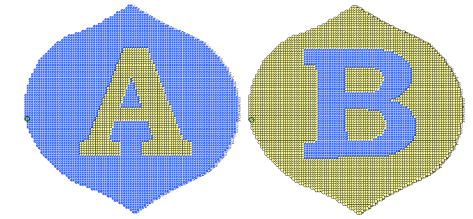
Note: Here, the setup is for a quad-sequin device. Our design includes two patterns – letter ‘A’ (front) and letter ‘B’ (back) – two colors either side. This gives us four color combinations: front to back, letter A to back, letter B to front, letter A to letter B.
3Create a background fill and turn off border and margin settings. Use the ‘V’ type fixing stitch.
4Choose a background color. In this case, we want the fill to flip between blue and yellow backgrounds. So we choose ‘B’ from the droplist (blue-on-yellow).
5With the Carving Stamp tool, set up your first pattern. This is to be a yellow letter ‘A’.
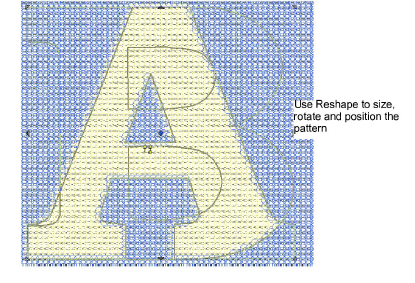
6Use the Reshape tool to size, rotate and position the stamp pattern. Click the diamond control point to activate sizing and rotation handles.
7Use the Sequin Split Edit tool to assign sequins to the selected area. Here we choose ‘D’ from the menu (yellow-on-yellow).
Tip: The sequin popup only shows the front color. Use Flip Sequins to check both sides.
8With the Carving Stamp tool, set up your second pattern.
9Use the Reshape tool to size and position the second pattern in relation to the first.
10Use the Sequin Split Edit tool to assign sequins to the second pattern. Holding down Ctrl, click to select multiple areas.
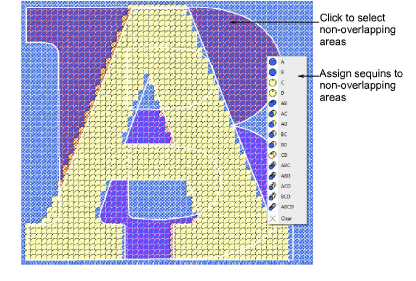
11Work systematically through the split areas of the second pattern:
Start with the non-overlapping areas.
Hold down Ctrl to select multiples.
Assign sequins from the popup menu. Here we choose ‘A’ from the menu (blue-on-blue).
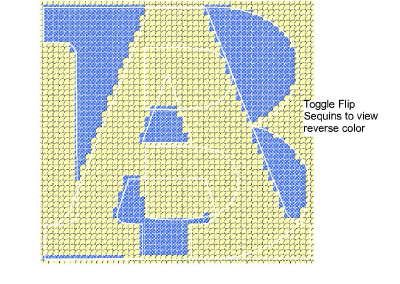
Toggle Flip Sequins to view the reverse color.
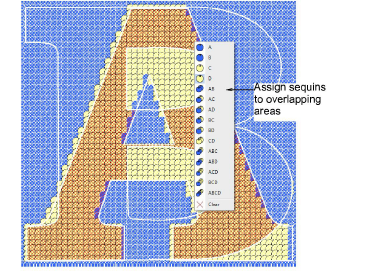
12Next look for the overlapping areas. Here we choose ‘C’ from the menu (yellow-on-blue).
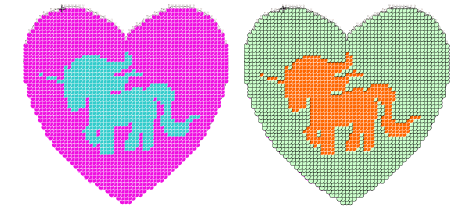
13Click Flip Sequins to view the reverse patterns as they will appear in stitchout.
|
Copyright ©2024 Wilcom Pty Ltd | Terms of Use | Privacy Policy |


