|
|
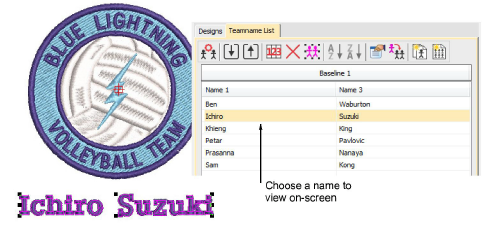
Use Toolbox or Docker > Team Names to associate multiple names with a design. |
|
|
Use Toolbox or Docker > Team Names to associate multiple names with a design. |
To associate team members with a design, you create a variable ‘teamname object’. Either key in the names of the team members directly, or import from a list provided by the customer.
Open the design you want to use.
Click the Team Names icon to access the docker. By default, the teamname object will consist of a single baseline with three names.
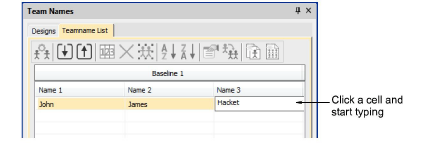
If you are happy with the default layout, simply click a cell and start typing. Press Tab or Shift+Tab to move back and forth through name fields.
Alternatively, use the Teamname List tools to add names, delete names, etc:
|
Tool |
Function |
|
|
|
Manage Teams |
Manage teams and team members for future use. See below. |
|
|
Import Team Members |
Import or export a list of team members in either TXT or CSV format. Names must be comma delimited. |
|
|
Export Team Members |
|
|
|
Name Order |
Change default naming order or include/exclude names as required. |
|
|
Delete selected rows or the entire member list. |
|
|
|
Select all list members for modification or positioning. |
|
|
|
Sort a selected column in ascending or descending order. |
|
|
|
||
Optionally, click the Import Team Members button to import team members from a list possibly provided by the customer. The list must be comma delimited.
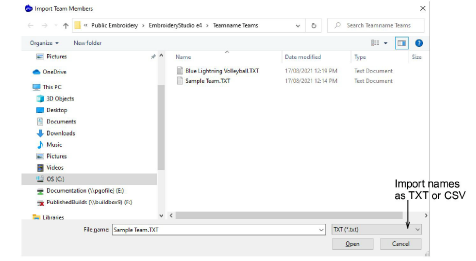
Tip: When you import a teamname list you can import it from anywhere. However, you cannot use the Manage Teams dialog effectively with it unless it is saved in the ‘Teamname Teams’ system folder. See Managing teams for details.
Click the Name Order button if you want to change the default naming order. Use it, for example, to put surnames first or limit which names are included – e.g first and third.
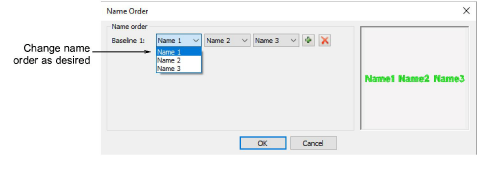
Click OK and enter reference points as prompted.
Select all names and select Stitch > Generate Stitches or press G.