A teamname object may contain all names in a given team, or a subset of those names. You can even combine members from different teams.
Open a teamname design and click the Team Names icon. By default all names are selected.
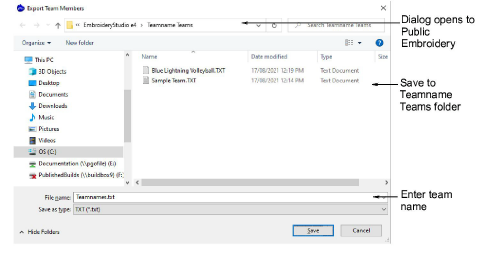
To save a team for future use, click the Export Team Members icon in the Teamname List. The dialog will open onto a public folder containing all your teams – a single file, either TXT or CSV, for each team.
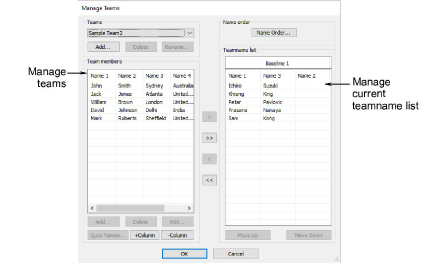
Click the Manage Teams icon to access the dialog. The Team Members panel will default to the last opened team.
To view the team you have just exported, select from the Teams droplist.
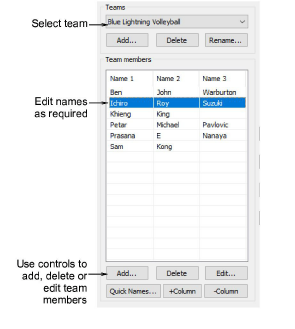
Use the +Column or -Column buttons to establish the number of names for each team member – the default is three (3).
Select names to associate with the design. To select multiple names, hold down Ctrl or Shift as you select.
Edit the list as necessary by means of Delete and Edit buttons.
Add team members one-by-one or as a group:
To add a single name, click Add in the Team Members panel.
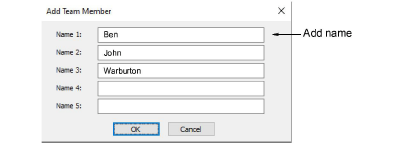
To add a group of names, click Quick Names. Enter names in the format Name 1, Name 2, Name 3.

Tip: You can type in the names, or paste them in from a text file. Each name must be separated by a comma. There is no need for a space.
Click OK. The new names are added to the Team Members list.
Transfer names, selectively or all together, to the Teamname list using the arrow buttons. You can even transfer names from different teams to the same list.
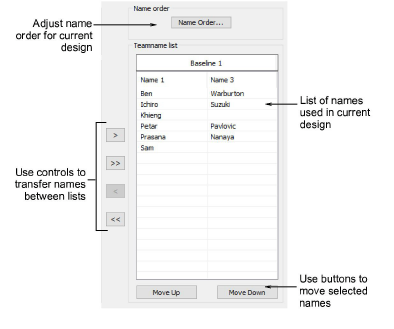
Edit the list as desired:
Sort names alphabetically by column.
Sequence names – this will determine their stitching order.
Remove names from the list.
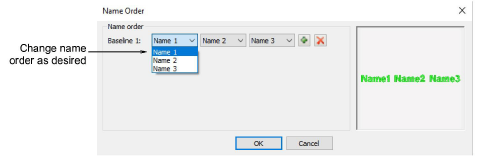
Click the Name Order button if you want to change the default naming order. Use it, for example, to put surnames first or limit which names are included – e.g first and third.
