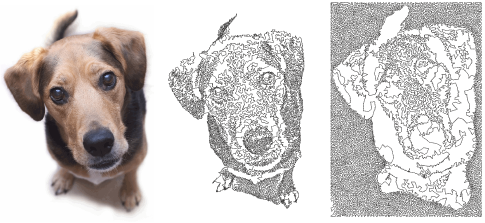
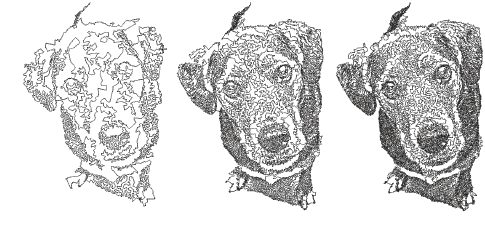
Reef PhotoStitch expands on the Photo Flash auto-digitizing method to convert photos and images to monochrome embroidery. Automatically fill shapes with open stitching reminiscent of a coral reef. The technique produces embroidery with a low stitch count based on the color contrast present in the image. It works best with images containing clearly defined areas with high-contrast colors.
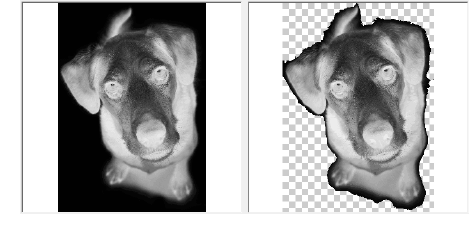
1Scan or insert the photo you want to use. For best results, use crisp images with well-defined subjects and strong contrasts. See Loading bitmap artwork for details.
2Size and/or crop the image for its intended purpose. 400mm (16”) is the limit. See Preparing photos for auto-digitizing for details.
3With the image selected, click Reef PhotoStitch. The Reef PhotoStitch dialog opens. This provides interactive control over grayscale image settings and embroidery settings.
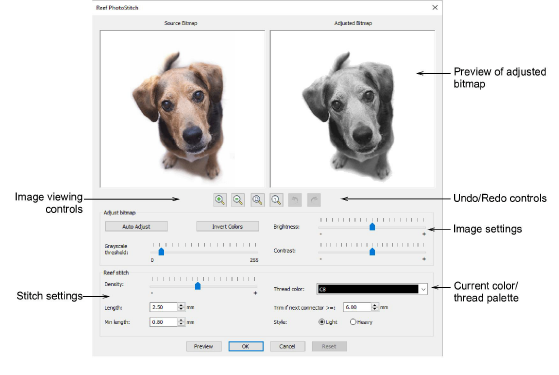
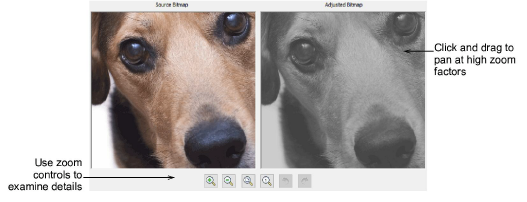
4Use the zoom buttons to examine the image preview in detail. Alternatively, zoom in and out with the mouse wheel.
5Use Preview to generate temporary stitching without closing the dialog. Move the dialog as necessary in order to preview the result in the design window. Artwork is hidden during preview.
1Adjust the grayscale image settings as preferred:
|
Setting |
Function |
|
Auto adjust |
Optimize image settings for automatic digitizing. |
|
Brightness |
Further differentiate stitched and unstitched areas. |
|
Contrast |
|
|
Grayscale threshold |
Use to further filter the number of gray tones in the image. |
|
Invert colors |
Create an image negative. |
Note: The results of the Invert Colors setting depend on whether you are using an image with a solid or transparent background.
2Use the Reset button to return to default values. Use the Undo and Redo buttons to back-step through previous adjustments.
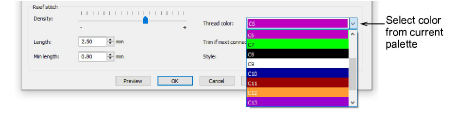
3Optionally, select a thread color from the droplist.
4Again, use Preview to generate temporary stitching without closing the dialog.
5Further refine image settings until you obtain the look you want and click OK to confirm.
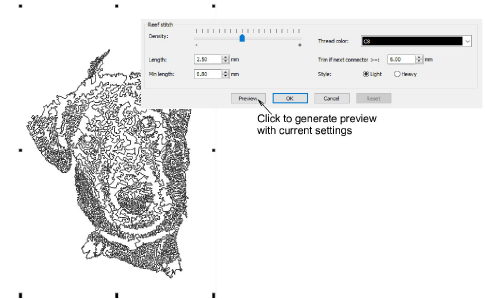
1Once you have obtained the grayscale settings you want, try adjusting stitch settings in combination with Preview.
These settings allow you to achieve a balance between overall stitch count and optimum coverage:
|
Setting |
Function |
|
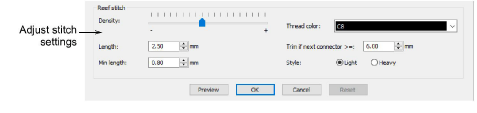
Density |
Create more dense or more open stitching, similar to ‘Loop Spacing’ in stipple stitching. The highest density value may result in thread breaks. |
|
Thread color |
Select the thread color you wish to apply to the end result. |
|
Length |
Set optimal stitch length – the greater the length, the fewer the number of needle points generated. |
|
Min length |
Adjust minimum stitch length to specify the shortest stitch to be generated. |
|
Trim if next connector >= |
Trims are inserted if connectors exceed the specified length. Higher values result in fewer trims but more connecting runs. |
|
Style |
Toggle between Light or Heavy for more open or dense stitching. This setting is independent of the Density setting. ‘Heavy’ approximately doubles the stitch count. |
2Experiment with Style of stitching – light or heavy.
3Again, use Preview to generate temporary stitching without closing the dialog.
4Further refine stitch settings until you obtain the look you want and click OK to confirm.
1Turn off the backdrop – press D – for a better view.
2Review the results. Things to check for:
Edges clearly defined
No unwanted connectors
Number of trims
Overall stitch count.
3If you are unsatisfied, click Undo and try again. Try different settings and check the previews. You may need to touch up the image in PHOTO-PAINT if none of the results is good enough.
Use crisp images with well-defined subjects and strong contrasts.
Be careful if, after processing a larger image, you decide to reduce the design size. Stitches may be too closely bunched and cause needle breaks.
Limit the amount of resizing done in EmbroideryStudio so as to retain as much image information as possible.
Try combining different outputs with different colors.
Posterizing effects may produce good results at lower thresholds. In Corel PHOTO-PAINT, this is available via Image > Transform Posterize.
Try applying filters such as Stucki, Jarvis and Crosshatch effects.
In Corel PHOTO-PAINT Stucki and Jarvis are available via Image > Convert to Black and White (1-bit). Adjust intensity as necessary.
Crosshatch is available via Effects > Art Strokes > Pen & Ink.
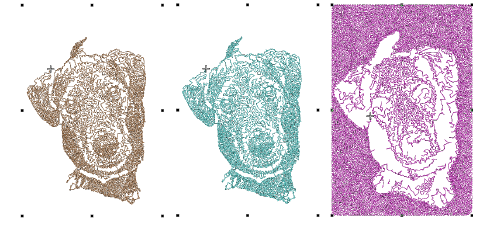
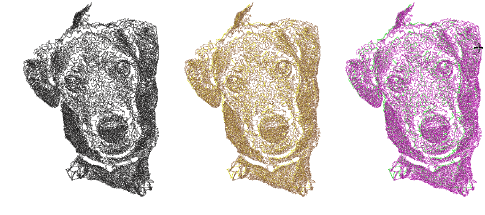
An interesting technique is offered by applying a halftone filter. In the sample below, the image is split into separate CMYK channels and Reef PhotoStitch applied to each one. In Corel PHOTO-PAINT select Image > Convert to CMYK Color and Image > Split Channels To > CMYK.

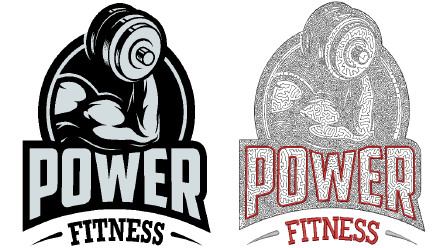
While originally intended for use with photographs, Reef PhotoStitch can also employ graphics to create appealing commercial embroidery.
|
Copyright ©2024 Wilcom Pty Ltd | Terms of Use | Privacy Policy |

