Use Color PhotoStitch to create embroidery from photographs and other images. While Photo Flash and Reef PhotoStitch produce designs in single-color stitching, Color PhotoStitch produces variegated stitching using multiple thread colors. The goal is the same for any photo – to employ the fewest colors/threads to obtain the fewest stitches and trims for a good result.
1Scan or insert the photo you want to use. For best results, use crisp images with well-defined subjects and strong contrasts. See Loading bitmap artwork for details.
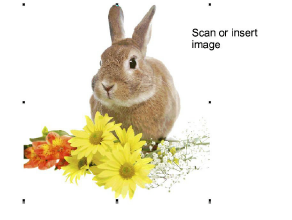
2Size and/or crop the image for its intended purpose. 400mm (16”) is the limit. See Preparing photos for auto-digitizing for details.
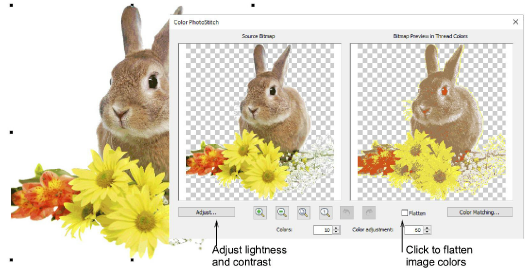
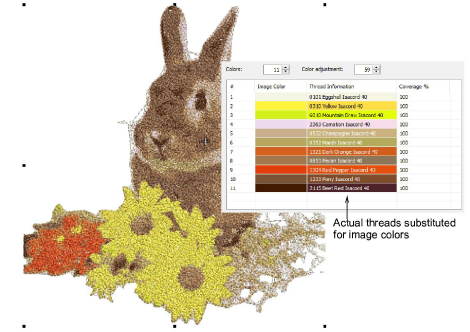
3With the image selected, click Color PhotoStitch. Color PhotoStitch analyzes the photo and generates a thread color list based on image colors. The dialog provides interactive control over color and stitch settings.
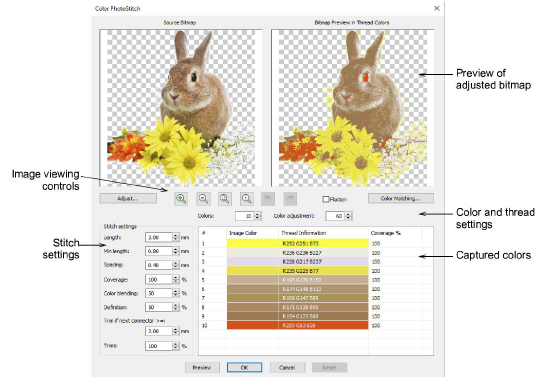
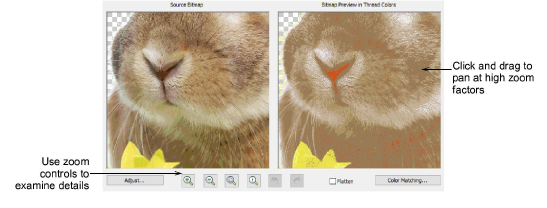
4Study the preview panel. Use the zoom buttons to examine the image preview in detail. Alternatively, zoom in and out with the mouse wheel.
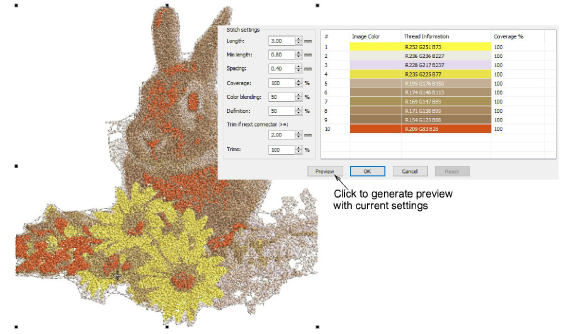
5Use Preview to generate temporary stitching without closing the dialog. Move the dialog as necessary in order to preview the result in the design window. Artwork is hidden during preview.
Study the stitch preview. The dialog provides various methods to adjust the thread list, starting with image colors.
Tip: The goal is the same for any photo – to employ the fewest colors/threads for a good result. There will be a point a diminishing returns where more colors do not necessarily result in greater design clarity or stitchability.
Use Flatten to condense the photo to solid color blocks. Depending on image quality – e.g. low-resolution or pixelated images – this may affect resulting detail.
You can make adjustments to image lightness and contrast via Adjust. This opens the Adjust Bitmap dialog. Start by clicking Auto Adjust. This works well for some photos.
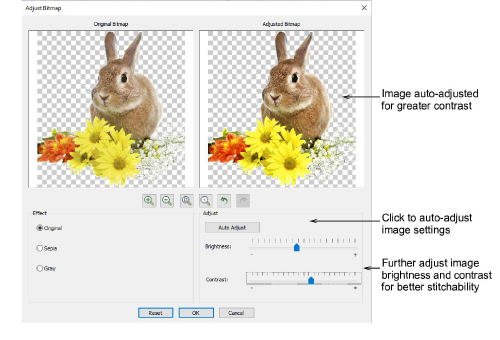
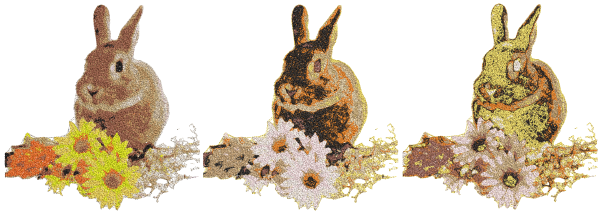
Optionally, in the Effect panel, choose between image variations:
|
Option |
Function |
|
Sepia |
In photographic terms, ‘sepia’ refers to the dark-brown color of old-fashioned prints. Originally the process involved adding a pigment made from cuttlefish ink during development. |
|
Gray |
Grayscale images are ones composed exclusively of shades of gray, varying from black at the weakest intensity to white at the strongest. |
Use the Reset button to return to default values. Use the Undo and Redo buttons to back-step through previous adjustments.
Click OK to close the dialog. The thread color list is updated accordingly. Again click Preview to visualize the output.
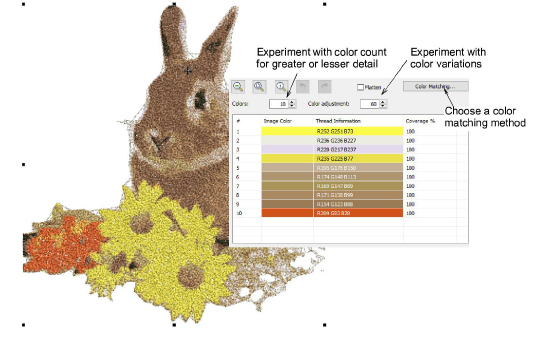
Use the Colors field to increase color count to draw out more detail. In some cases, you may want to reduce color count to decrease numbers of similar shade.
Click the Color adjustment swivel to experiment with color variations. These are generated automatically so you cannot select specific colors as such. If a color occupies more than 5% of the total area, it will be included by default.
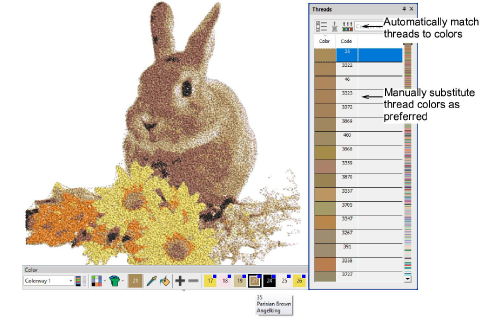
When you have a color combination that works for you, use the Color Matching button to assign actual threads to bitmap colors.
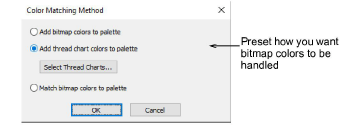
Tip: To match the result most closely to the source bitmap, leave the default ‘Add bitmap colors to palette’ setting unchanged. After the design is created, you can then pick a thread for each color prior to production.
Tip: You can preset Color Matching Method to determine how you want thread color matching to be handled. The technique is the same. See Loading bitmap artwork for details.
Again, click Preview to test your settings.
Once you have obtained the desired color settings, try adjusting stitch settings in combination with Preview. These allow you to achieve a balance between overall stitch count, trim count, and optimum coverage. You are always seeking to obtain a good result with the fewest possible stitches and trims.
There is no particular workflow associated with these fields. The table below summarizes the function of each. It’s a matter of testing values in conjunction with Preview to arrive at a satisfactory result.
|
Field |
Function |
|
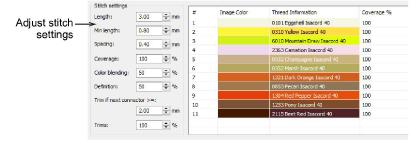
Length / Min length |
Color PhotoStitch color blocks are comprised of run stitching. The minimum and maximum stitch lengths allowable in a design determine the outside limits as measured between needle penetration points. Generally speaking, the shorter the length, the smoother the curves, at the expense, however, of increased stitch count. |
|
Spacing |
The smaller the value, the greater the stitch density. For more open stitching, use larger values. |
|
Coverage |
This setting affects overall stitch density. Lower percentages result in less dense coverage. |
|
Color blending |
This setting affects overlapping areas of color. Increasing this value will generally result in greater color block separation. |
|
Definition |
This setting affects the sharpness of image details. Reducing this value will generally result in greater image definition. |
|
Trim if next... |
Trims are inserted if the next connector exceeds the length you specify. |
|
Trims |
This setting affects the number of trims and tie-offs in the design. Reduce trim count by increasing trim length and decreasing the trim percentage setting, at the expense, however, of more connecting runs. |
For instance, use the Color blending setting to increase or decrease overlapping colors. Reducing this value will generally result in greater color block separation.
Use Coverage to adjust overall stitch density. Lower percentages result in less dense coverage. This may be desirable in order to reduce stitch count depending on background color.
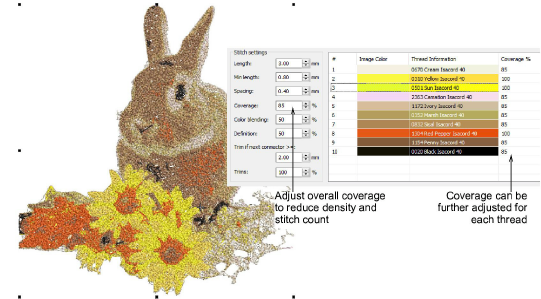
Note: Coverage can be further adjusted for each thread by double-clicking a field in the Coverage column. Differential values can be used to enhance foreground details or diminish background colors.
Adjust Length settings for greater or lesser precision. Shorter length will result in greater detail at the cost of a higher stitch count.
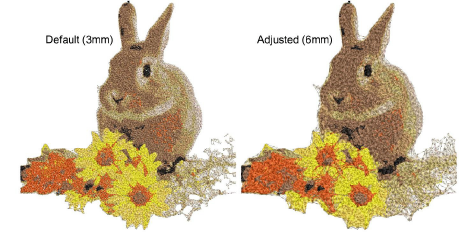
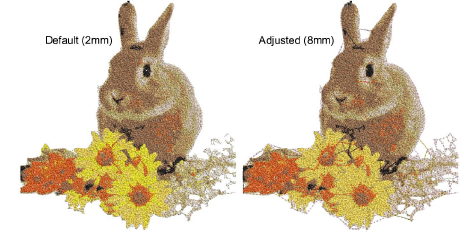
Adjust Spacing settings for greater or lesser density. Again, closer spacing will result in greater detail at the cost of a higher stitch count.

Tip: You can reduce stitch count by increasing stitch length and stitch spacing, reducing overall and individual coverage % settings.
Adjust trim settings for more or fewer trims. The higher the value, the more connectors but fewer trims.
Keep experimenting until you achieve the desired result. Click OK to confirm.
Note: Both stitch and trim counts can only be checked after the Color PhotoStitch dialog is closed. While you remain in the same design window, current settings are retained except for thread coverage. This returns to the default 100%. Note these settings if you want to return to the Color PhotoStitch dialog.
Turn off the backdrop – press D – for a better view.
Review the results. Things to check for:
No obvious holes in coverage
Number of trims
Overall stitch count.
Caution: Be careful if, after processing a larger image, you decide to reduce the design size. Stitches may be too closely bunched and cause needle breaks.
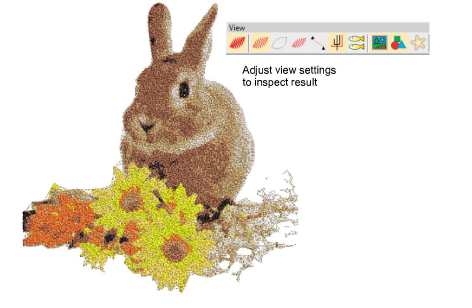
Check the results with TrueView™ on and off. Turn connector stitching on and off. For better visualization, set TrueView™ viewing options to thin thread.
If you are unsatisfied with the results, click Undo and try again. Try different settings and check the previews. You may need to touch up the image in PHOTO-PAINT if none of the results is good enough.
It’s useful to check needle penetrations with TrueView™ off as holes/gaps and stitch density can be easily seen.
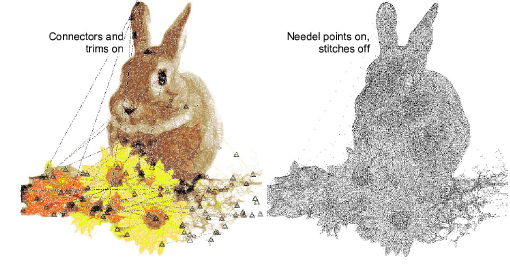
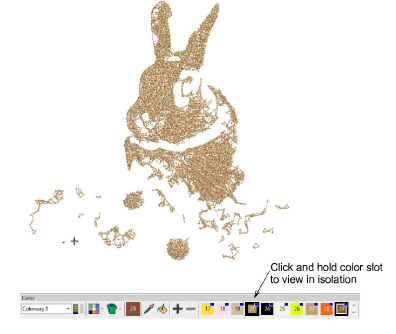
Locate colors. Click and hold each color slot in turn to view associated stitching.
Fine-tune thread color selection as preferred. Choosing the right thread is key to a good result. If you have added RGB colors to the color palette, open the Threads docker. Select a chart from the Thread Charts dialog. Here you can manually or automatically match threads to palette colors.
Try cycling through used colors for some interesting effects.
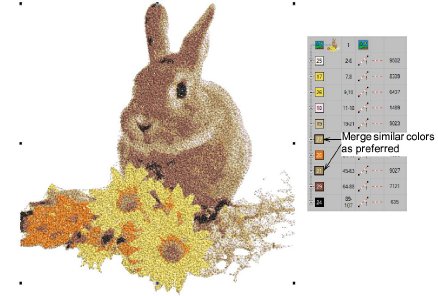
Optionally, manually merge thread colors in the Sequence docker for reduced thread color changes.
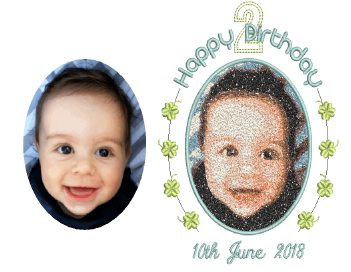
Combine Color PhotoStitch with lettering, satin borders, and motifs to create appealing keepsakes.
For best results, use crisp images with well-defined subjects and strong contrasts.
For a grayscale photo, 5-6 shades which gradually change from white/light gray to dark gray/black are usually enough for a good stitching result.
For a simple color photo, 7-10 colors may be enough. If a color occupies more than 5% of the whole area, it will be included by default.
For a complicated photo with many different colors, 14-16 colors may be good enough. Try to limit colors to no more than 20 as every thread change counts.
Limit the amount of resizing done in EmbroideryStudio so as to retain as much image information as possible. If an image is much too large for its intended purpose, resize and resample it in any linked CorelDRAW® or external graphics applications before applying auto-digitizing techniques. This will generally produce a better result.
While originally intended for use with photographs, Color PhotoStitch can also employ graphics to create appealing commercial embroidery.

|
Copyright ©2024 Wilcom Pty Ltd | Terms of Use | Privacy Policy |

