|
|
Use Auto-Digitizing > Smart Design to create embroidery designs directly from imported artwork. |
|
|
Use Auto-Digitizing > Keep Graphic Objects to retain original artwork during conversion. |
|
|
Use Auto-Digitizing > Smart Design to create embroidery designs directly from imported artwork. |
|
|
Use Auto-Digitizing > Keep Graphic Objects to retain original artwork during conversion. |
For more control over object conversion, use the Smart Design method. This can recognize shapes in artwork and allow you to preset suitable stitch types for conversion. Smart Design determines stitching sequence based on closest join. Artwork is effectively ‘batch processed’ to create the many embroidery objects that make up a design. The tool handles both bitmap and vector formats.
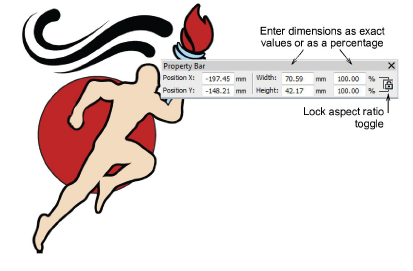
1Load and preset the artwork as necessary.
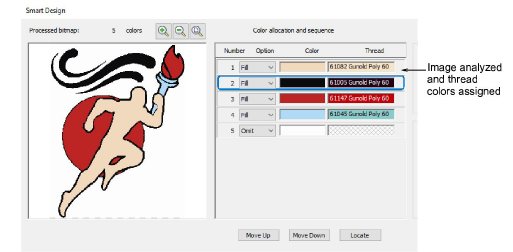
2Select the image and click Smart Design. If the image requires preprocessing, the software displays the Prepare Bitmap Colors dialog. See Preparing artwork for auto-digitizing for details.
Next, the Smart Design dialog opens. EmbroideryStudio will attempt to classify image colors as fills or details and sequence them accordingly. Details may take the form of outlines or ‘pickout runs’. By default, the image background is omitted altogether.
Tip: The artwork may include outlines as part of the image. However, the software itself can generate outlines around color blocks in the design.
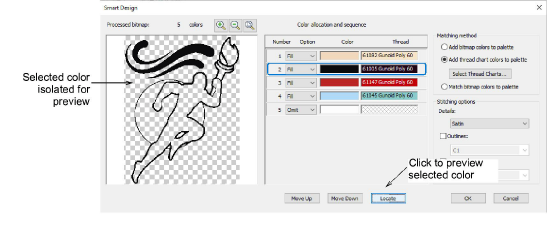
3Select a color in the list and use the Locate button to preview.
4Having located the colors, decide if you want to change the software defaults. You can treat colors as fills or details, or omit them altogether.
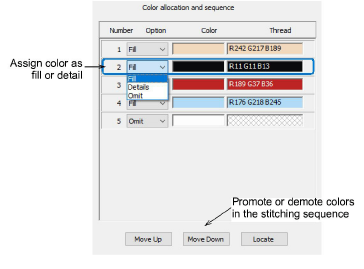
5Use the ‘Move’ buttons to re-sort the color sequence as preferred. Fills should be stitched first, details last.
1Select a conversion method for color matching:
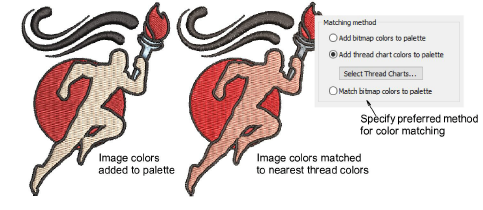
You have three options:
Add bitmap colors directly to the design palette (recommended). These can be later assigned to actual threads.
Choose a chart and match bitmap colors to actual threads. Click the Select Thread Charts button to access thread charts.
Or, match bitmap colors to the nearest colors in the current design palette.
2Select stitching options for handling details, outlines, and borders:
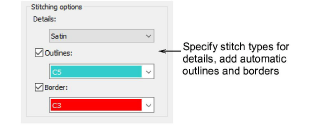
You have three options:
|
Option |
Purpose |
|
Details |
Handle details as Satin, Column C, or Double Run. Select an option from the droplist. |
|
Outlines |
Add outlines to all detected color blocks. Pick a thread color from the droplist. If your artwork already includes outlines as part of the image, omit the outline color first. |
|
Border |
Add a satin border to the entire design. Again, pick a color from the droplist. |
See examples below.
Click OK to process the image.

The artwork here includes its own outlines. An alternative method is to allow the software to generate outlines. The Outlines option reinforces all color blocks with continuous, branched running stitches. Here we omit the artwork color, and turn on Outlines stitching option instead.
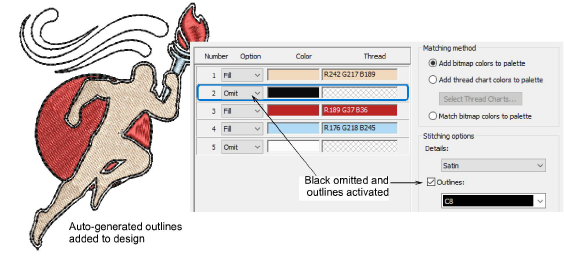
Additionally, you can generate a border around the entire design with Border stitching option.

Edit object properties as preferred, including colors, stitch types, and so on. Even convert run outlines to satin borders.
Use the Color-Object List and/or Sequence toolbar to optimize the stitch sequence of your auto-digitized objects.
Use Closest Join and/or Reshape tools to minimize connectors.
Toggle underlays on/off with the Auto Underlay button.
Details created from auto-digitizing are treated as branched objects. If you want to change stitch type to, say, Satin, Raised Satin, Zigzag or Blanket, the object needs to be unbranched before these stitch types can be applied.
|
Copyright ©2024 Wilcom Pty Ltd | Terms of Use | Privacy Policy |

