EmbroideryStudio le permite cambiar los puntos de entrada y salida de objetos individuales. Los puntos de entrada y salida deberían ser verificados también cuando usted procede a realizar una nueva secuenciación de los objetos en el diseño.
Idea: Las uniones más cercanas no se mantienen automáticamente cuando se mueven, resecuencian, o editan los objetos. La prestación Aplicar unión más cercana permite reaplicar la unión más cercana a los objetos después de la edición.
3Seleccione el objeto y haga clic en Reformar objeto.
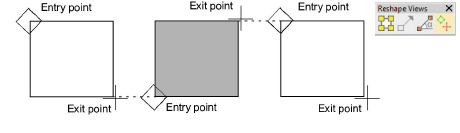
3Haga clic en Mostrar entrada/salida para ver solo los puntos de entrada y salida.
3Para ver el objeto siguiente o el anterior, pulse las teclas Tab o Mayús+Tab. Se confirman los cambios a los objetos.
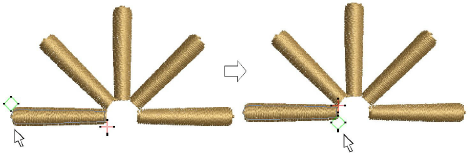
3Seleccione los puntos de entrada o salida de los objetos adyacentes y arrástrelos para aproximarlos.
3Pulse Intro
Idea: Si está digitalizando columnas contiguas, puede mantener u omitir la última puntada en la primera columna para conseguir una unión más suave o puntadas de conexión más cortas.
3Secuenciar los objetos de bordado
3Mantener u omitir las últimas puntadas
Productos
Complementos de EmbroideryStudio
Soluciones
Aprendiendo
|
Copyright ©2025 Wilcom Pty Ltd | Condiciones de uso | Política de privacidad |

