Configurar posicionamiento de aro automático o fijo
Por defecto, la posición de aro es fija en EmbroideryStudio. Esto significa que el aro no se mueve de su posición original. Digitalice un punto en el diseño alrededor del cual se centrará un aro. Si prefiere, habilite el centrado automático para asegurar que el centro del aro esté alineado con el centro geométrico del diseño.
Nota: Algunas máquinas de bordado siempre centrarán el diseño. Configure su software para que coincida con el comportamiento de la máquina.
Para configurar el posicionamiento automático del aro...
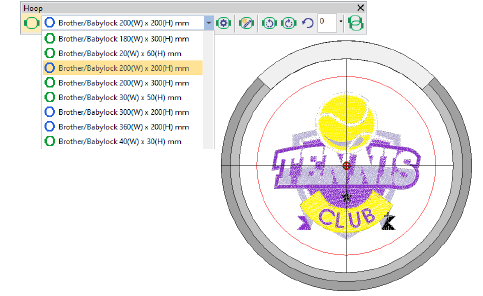
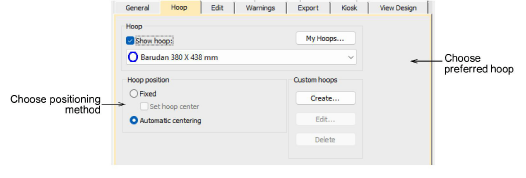
1Haga clic en Opciones de aro o haga clic derecho en el icono Mostrar aro. Se abre el diálogo Opciones > Aro.
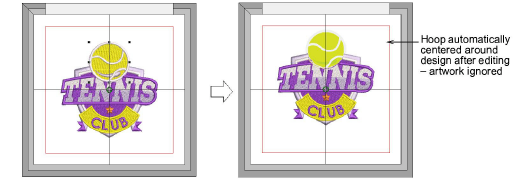
2En el panel Posición del aro, elija Centrado automático. El aro se centrará alrededor del centro geométrico del diseño.
Para configurar el posicionamiento fijo del aro...
3La posición de aro Fijo puede usarse en conjunto con la posición de inicio de la aguja en las máquinas que la tienen. Desactive el botón de alternancia Inicio y fin automáticos. Esto configura los puntos de inicio y fin en la primera y última puntadas del diseño.
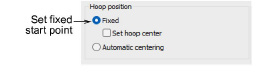
3En el panel Posición de aro, elija la opción Fijo:
3Fijo: Use esta opción para asegurar que el aro no se mueve de su posición original. Esto significa que no se centrará automáticamente mientras usted esté digitalizando. Esto puede ser importante si está combinando bordado con impresión o si quiere bordar en algunas ubicaciones como los bolsillos de pecho.
3Fijo > Configurar centro del aro: Esto le permite centrar el aro alrededor de un punto fijo. Después de hacer clic en Aceptar, marque un punto en la ventana de diseño en el cual desea centrar el aro. Puede hacer esto si el proyecto incluye un punto de referencia para centrar el aro.
Consejos de uso...
3Use la opción Fijo solo en las máquinas que le permiten mantener conectores de inicio y fin.. Asegúrese de que su máquina esté configurada para mantener la posición de inicio de diseño guardada.
3Para mantener el diseño en la misma posición de aro en la máquina al guardarlo en EmbroideryStudio, configure la posición de inicio en ‘Posición de inicio de aguja en el aro’ en el diálogo Inicio y fin automáticos, y la Posición de aro en ‘Fijo’ en la pestaña Opciones > Aro. Vea Configurar puntos de inicio y fin para más información.