Reformar objetos con nodos de reforma
Cambie las formas de los objetos con la herramienta Reformar objeto.
Para reformar objetos con nodos de reforma...
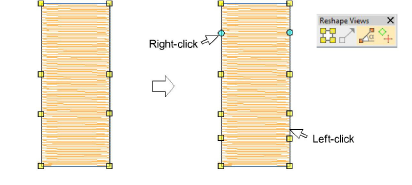
1Seleccione el objeto y haga clic en Reformar objeto. Los puntos de control aparecen con la barra de herramientas Vistas de reformar.
2Active Mostrar nodos de reformado y desactive otros iconos.
3Opcionalmente, presione S para apagar la visualización de puntada y enciéndala nuevamente cuando este listo para regenerar las puntadas.
4Añada los nódulos tal como requiera.
3Haga clic con el botón izquierdo para añadir un nódulo de esquina.
3Haga clic con el botón derecho para añadir un nódulo de curva.
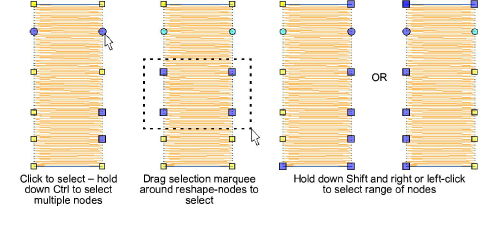
5Seleccione reformar los nodos en la forma siguiente:
3Haga clic en un solo nodo.
3Haga clic y arrastre un cuadro de selección alrededor de un grupo de nódulos.
3Use las teclas Ctrl o Mayús para seleccionar varios nodos. Los pinchazos con botón izquierdo o derecho en formas cerradas reversa la dirección de la selección.
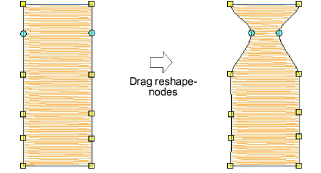
6Ajuste la posición del nodo de reforma arrastrándolo a lo largo del contorno.
Consejos de uso...
3Use las teclas de flechas para ‘empujar’ los nódulos seleccionados.
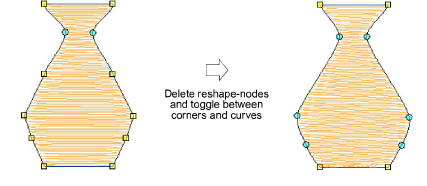
3Pulse Eliminar para eliminar nodos indeseados.
3Pulse la Barra espaciadora para alternar entre nódulos de esquina y de curva.
3Pulse Esc para descartar los cambios. Pulse Esc otra vez para salir de la modalidad de Reformar.
3También puede ajustar los ángulos de puntada además de cambiar los puntos de entrada y salida.
Temas relacionados...
3Reformar objetos con controles Bézier
3Opciones reformar
3Ajustar ángulos de puntada