Es posible crear objetos de apliqué que se traslapan con puntadas de cobertura parcial sin repetir orlas usando la herramienta Apliqué parcial. En combinación con la herramienta Eliminar traslapes, puede eliminar toda el bordado subyacente.
1Digitalizar formas apliqué con Apliqué.
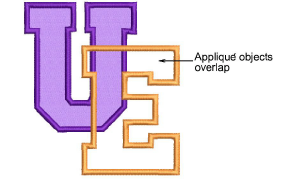
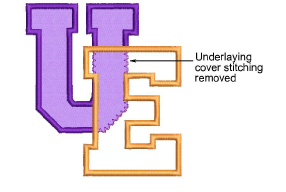
2Si solo desea eliminar la puntadas de cobertura subyacentes, seleccione ambos objetos y haga clic en Apliqué parcial. Las puntadas de cobertura se generan en el sentido de las agujas del reloj entre los puntos inicial y final, dejando el resto del borde sin bordar.
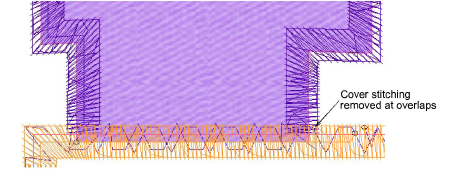
3Si desea eliminar la totalidad de las puntadas subyacentes, primero seleccione el objeto ‘cortador’ y después seleccione Disponer > Eliminar traslapes o haga clic con el botón derecho en la herramienta.
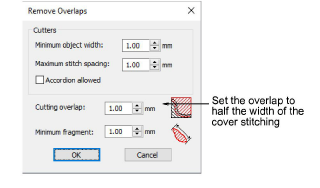
4Establezca el traslape de corte a la mitad de la anchura de las puntadas de cobertura – p.ej. 2mm – y haga clic en Aceptar.
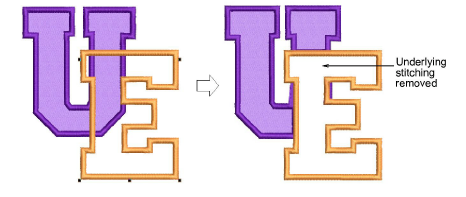
5Seleccione todos los objetos y haga clic en Apliqué parcial para eliminar las puntadas de cobertura subyacentes.
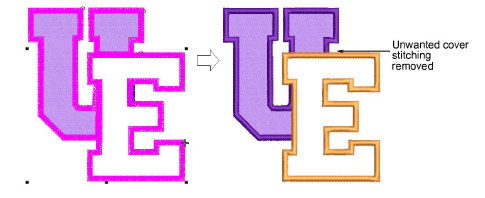
6Elimine los fragmentos indeseados y aumente el zoom para verificar los traslapes.
3Digitalizar objetos de apliqué
3Eliminar puntadas subyacentes
Productos
Complementos de EmbroideryStudio
Soluciones
Aprendiendo
|
Copyright ©2025 Wilcom Pty Ltd | Condiciones de uso | Política de privacidad |


