Es un asunto sencillo incluir un trasfondo de diseño en su esquema de diseño – p.ej., una gorra.
1Haga clic en el icono Visualizador de prenda. Aparece el panel acoplable.
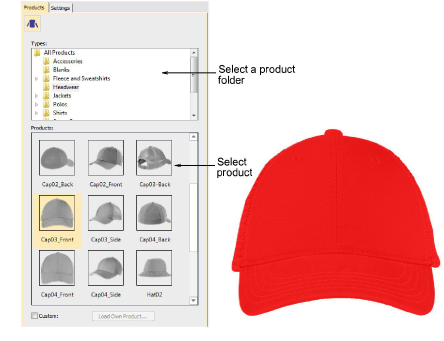
2Seleccione una imagen de producto – p.ej., una gorra – y establezca el color como desee.
3Coloque el objeto de letras en la posición cero (0,0) como se muestra. Esto asegurará que el esquema de letras se centre automáticamente en el área de bordado permitida.
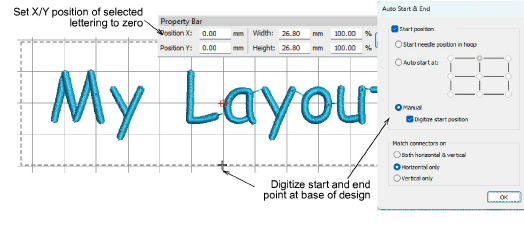
4Como el objeto de letras y el límite de bordado pueden no estar en la posición correcta para los trasfondos, haga clic en el icono Inicio y fin automáticos y digitalice un punto de inicio y fin como se muestra.
Nota: El límite de bordado se bloquea en la plantilla. Debe desbloqueárselo para moverlo.
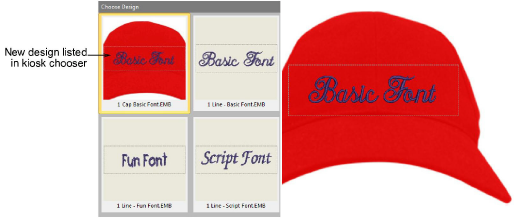
5Cuando esté contento con el resultado, haga clic en Guardar.
El archivo debe guardarse en la carpeta Diseños de EmbroideryStudio 2025:
C:\Program Files\Wilcom\EmbroideryStudio 2025\KioskDiseños
El diseño aparecerá en el área para escoger diseño del quiosco al ejecutarlo luego.
3Cambiar la ubicación del diseño
Productos
Complementos de EmbroideryStudio
Soluciones
Aprendiendo
|
Copyright ©2025 Wilcom Pty Ltd | Condiciones de uso | Política de privacidad |


