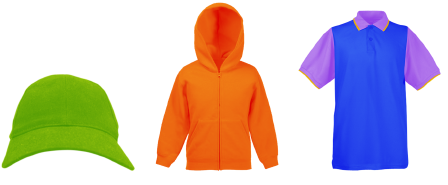
EmbroideryStudio le permite escoger una prenda o trasfondo de producto sobre el cual colocar su decoración. Esta función se utiliza principalmente para mostrar la ubicación, tamaño y apariencia general para propósitos de visualización y aprobación. Las hojas de trabajo de producción proporcionan una opción para imprimir hojas de aprobación con o sin trasfondos de prenda.
Elija colores para cada tipo de producto. El software proporciona una biblioteca de prendas de marcas y estilos comunes. Se admiten hasta tres capas de color para prendas multicolores.
1Abra el diseño y selccione la combinación de color.

2Haga clic en el icono Visualizador de prenda. Aparece el panel acoplable.
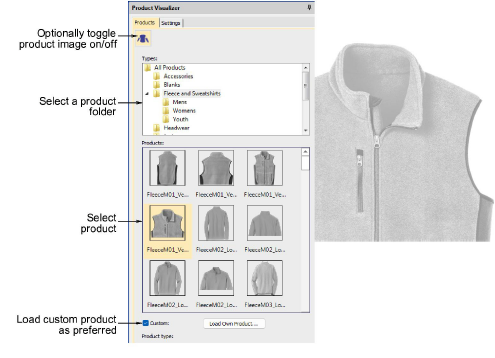
3Seleccione una categoría y haga clic en una prenda o un producto para seleccionar. La imagen del producto se centra en la ventana de diseño con el tamaño predeterminado.
4Opcionalmente, una opción Personalizado le permite importar imágenes de producto personalizadas. Ellas tienen que prepararse como imágenes en escala de grises. Necesitan dimensionarse correctamente.
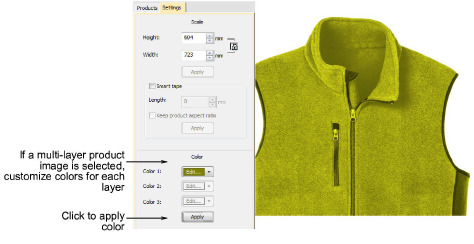
5Cambie a la pestaña Configuraciones. Ella le permite colorear, dimensionar y posicionar el producto en la ventana de diseño.
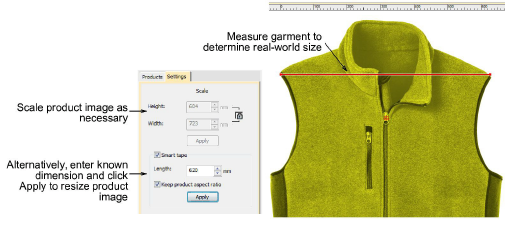
6Cambie la escala de la imagen del producto como necesite. La escala debe ajustarse según el tamaño de la prenda – XS, S, M, L, XL, or XXL.
7Opcionalmente, use la función Cinta inteligente para medir, por ejemplo, el tamaño del hombro con la regla. Ajuste el campo Longitud y pulse Aplicar para redimensionar la imagen del producto. Use la configuración Mantener proporciones según sea apropiado.
8Finalmente, posicione el diseño sobre la imagen de producto. Pulse Ctrl+A para seleccionar y arrastrar o use las teclas de flecha para desplazarlo con precisión.
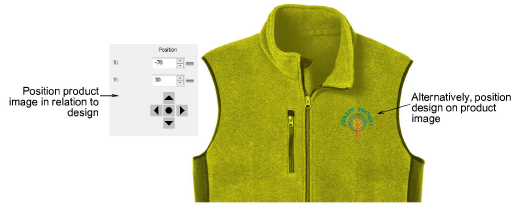
9Alternativamente, posicione la imagen de producto en relación con el diseño. Por defecto, el centro se coloca en el origen del diseño. Los campos ‘X’ y ‘Y’ muestran 0,0.
3Ingrese valores directamente en los campos ‘X’ y ‘Y’ para mover el centro de la imagen a una nueva ubicación.
3Use los botones de desplazamiento con precisión para mover la imagen en pequeños incrementos.
3Para activar/desactivar el plano de fondo del producto, haga clic en el ícono Mostrar prenda.
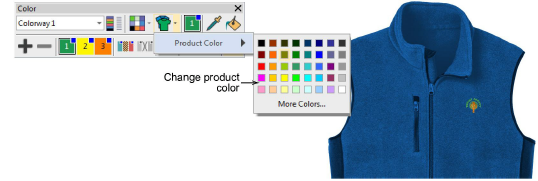
3Para cambiar colores ‘al vuelo’, use la lista desplegable Visualizador de prenda y cambie los colores del tela mediante el menú emergente Color de producto.
Productos
Complementos de EmbroideryStudio
Soluciones
Aprendiendo
|
Copyright ©2025 Wilcom Pty Ltd | Condiciones de uso | Política de privacidad |


