Alternativamente, tiene acceso a las capacidades completas de EmbroideryStudio para crear diseños desde cero. El menú Ayuda provee ayuda en pantalla.
1Si está creando un diseño desde cero, use el comando Archivo > Nuevo de plantilla.
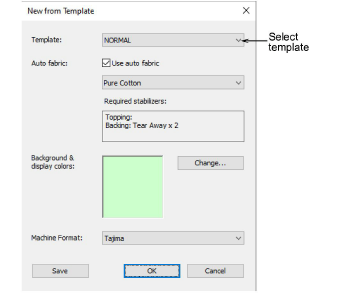
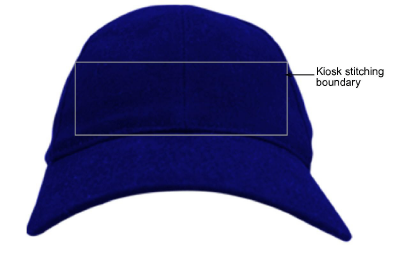
2Seleccione una plantilla en el quiosco si ha configurado una. Por ejemplo, puede configurar su plantilla de forma que incluya un límite de bordado para definir el área dentro de la cual trabajar para, digamos, los diseños de gorra. Esto puede dibujarse en Modalidad gráficos. Puede desear incluir también una imagen de producto.
3Seleccione la herramienta Letras y cree el texto que requiera. Ajuste las configuraciones tales como fuente, dimensiones, etc.
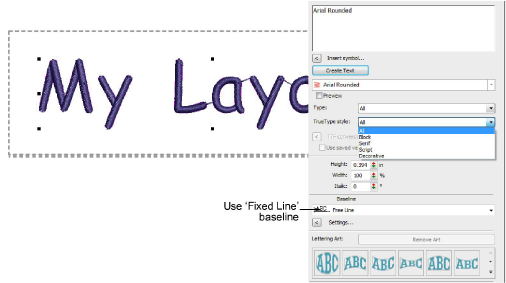
Nota: Para asegurarse de que el texto permanece dentro del límite permitido, es preferible usar la línea de base Línea fija.
4Cambie el color del hilo como desee.
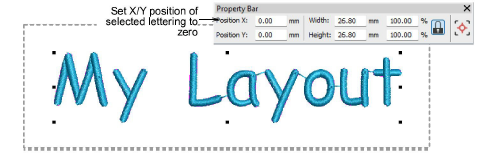
5Coloque el objeto de letras en la posición cero (0,0) como se muestra. Esto asegurará que el esquema de letras se centre automáticamente en el área de bordado permitida.
6Cuando esté contento con el resultado, haga clic en Guardar.
El archivo debe guardarse en la carpeta Diseños de EmbroideryStudio 2025:
C:\Program Files\Wilcom\EmbroideryStudio 2025\KioskDiseños
El diseño aparecerá en el área para escoger diseño del quiosco al ejecutarlo luego.
3Configurar los colores de hilo
3Cambiar la ubicación del diseño
Productos
Complementos de EmbroideryStudio
Soluciones
Aprendiendo
|
Copyright ©2025 Wilcom Pty Ltd | Condiciones de uso | Política de privacidad |

