Algunos niveles de producto EmbroideryStudio incluyen Conjunto de gráficos CorelDRAW® como estándar. Esto le permite añadir y formatear letras TrueType en Modalidad gráficos. Las letras pueden ser convertidas luego ya sea a letras de bordado u objetos de bordado.
Nota: Para una descripción detallada de la interfaz Conjunto de gráficos CorelDRAW®, acceda al menu Ayuda en la modalidad Modalidad gráficos.
1Cambie a Modalidad gráficos.
2Cree un objeto de texto de Conjunto de gráficos CorelDRAW® y selecciónelo.

3Haga clic en Convertir gráficos a bordados. Se abrirá la modalidad Modalidad bordado al cabo de unos momentos, y se muestran las letras de bordado convertidas. Cambie a fuente de bordado nativo y ajuste las configuraciones como desee.

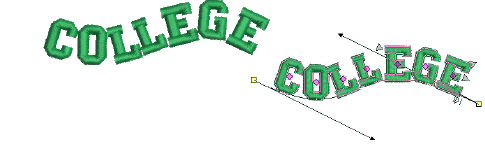
3Puede crear letras a lo largo de cualquier forma de línea de base en la modalidad Modalidad gráficos y convertirlas en letras de bordado.
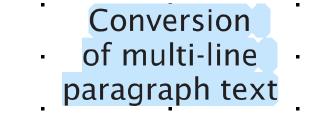
3Puede también convertir texto de párrafo multilínea con justificación a la izquierda, al centro o a la derecha.
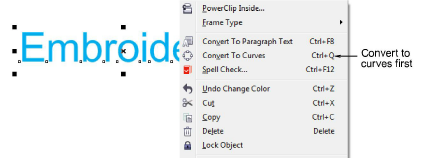
Idea: Si usted no está satisfecho con los resultados de conversión de letras y quiere conservar el aspecto exacto del texto original, ensaye a convertir a curvas primero y luego a bordado sencillo. Haga clic derecho y seleccione Convertir a curva. Opcionalmente, use Marcar relleno como satín ondulante para marcar letras para conversión a puntadas ondulantes.
Productos
Complementos de EmbroideryStudio
Soluciones
Aprendiendo
|
Copyright ©2025 Wilcom Pty Ltd | Condiciones de uso | Política de privacidad |

