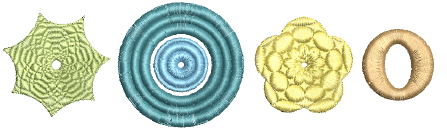
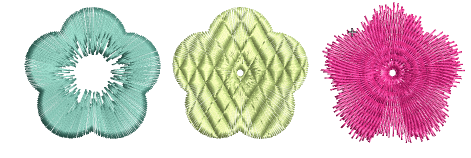
Relleno radial crea puntadas radiales ondulantes en los objetos Satín, Tatami o División programada. Las puntadas se generan desde el borde exterior hasta el centro geométrico. El centro puede desplazarse. El efecto puede estar habilitado o deshabilitado mientras se digitaliza. Las operaciones como Reflejar-fusionar o Eliminar traslapes conservan el efecto.
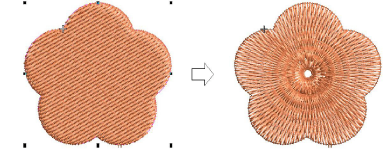
1Seleccione un objeto cerrado y haga clic en el icono Relleno radial.
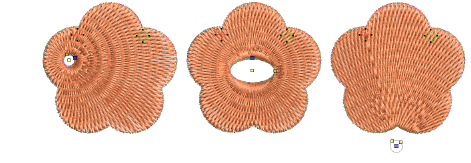
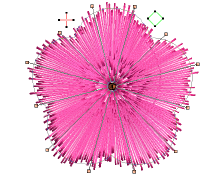
2Para modificar, seleccione y haga clic en Reformar objeto. En la modalidad Reformar, usted puede:
3Mover el punto central de las puntadas radiales.
3Definir el tamaño del hueco central.
3Editar la forma del hueco para círculos/elipses.
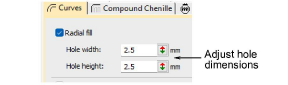
3Alternativamente, las propiedades del hueco pueden cambiarse mediante Propiedades del objeto.
Idea: Como en la puntada Relleno en espiral, el centro del efecto Relleno radial puede moverse por fuera de la forma o dentro de un hueco inscrito en ella para lograr un efecto diferente, sin perder la forma original.
3Opcionalmente, aplique Satín, División programada y/o Borde dentado junto con Relleno radial.
4Pulse Intro para aplicar, Esc para terminar.
3No todos los patrones y configuraciones de puntada u objetos (dependiendo del tamaño) son adecuados para Relleno radial. En particular, si lo está utilizando con objetos grandes, aplique uno o varios de los métodos siguientes para evitar aglomeración en el centro...
3Aumente el tamaño del hueco, mueva el centro a un hueco existente en el objeto o muévalo afuera del objeto.
3Añada Borde dentado al interior.
3Use un espaciado de puntada mayor – aumente aproximadamente un 20%.
3Evite patrones que añaden penetraciones de aguja cerca del centro del objecto.
3Use refuerzo de Corrido de borde con los objetos pequeños para reducir el número de puntadas en el centro del objeto.
3El Relleno radial puede aplicarse a formas anulares. El centro del efecto radial yacerá dentro del hueco del anillo. Use Reformar para ajustar como sea necesario.
3No puede editar directamente los ángulos de puntada generados por el Relleno radial. Sin embargo, puede aplicar Desintegrar para editar el ángulo de rotación del objeto cerrado resultante. Vea también Desintegrar los objetos compuestos.
Productos
Complementos de EmbroideryStudio
Soluciones
Aprendiendo
|
Copyright ©2025 Wilcom Pty Ltd | Condiciones de uso | Política de privacidad |

