
Revise los resultados. Cosas para verificar:
3Huecos obvios en el cubrimiento
3Cantidad de recortes
3Número de puntadas total.
Advertencia: Tenga cuidado si después de procesar una imagen grande decide reducir el tamaño del diseño. Las puntadas pueden estar demasiado apretadas y hacer que las agujas se rompan.
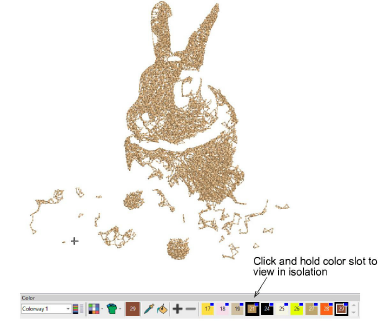
1Desactive el trasfondo – pulse D – para una mejor visualización.
2Verifique los resultados con TrueView™ habilitado y deshabilitado. Habilite y deshabilite las puntadas de conexión. Para una mejor visualización, fije las opciones de visualizacion TrueView™ en hilo delgado.

Idea: Es útil verificar las penetraciones de la aguja con TrueView™ desactivado para ver fácilmente los agujeros/brechas y la densidad de puntada.
3Si está insatisfecho con los resultados, haga clic en Deshacer e intente de nuevo. Ensaye configuraciones diferentes y revise las vistas previas. Puede tener que retocar la imagen en PHOTO-PAINT si ninguno de los resultados es lo suficientemente bueno.
4Cómo ubicar los colores. Haga clic y sostenga en cada ranura de color a su turno para ver el bordado asociado.
5Afine la selección de color de hilo como prefiera. La selección del hilo correcto es clave para obtener un buen resultado. Si ha añadido colores RGB a la paleta de colores, abra el panel acoplable Hilos. Seleccione una carta en el diálogo Cartas de hilos. Allí puede casar los hilos a los colores de la paleta manual y automáticamente.
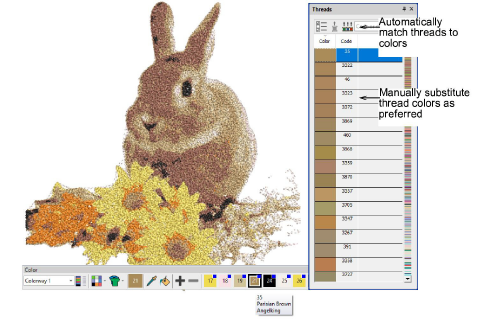
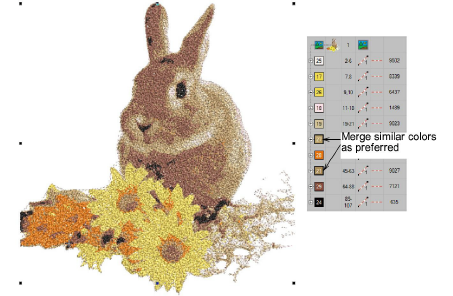
6Opcionalmente, fusione colores de hilo manualmente en el panel acoplable Secuencia para reducir los cambios de color de hilo.
3Use imágenes con temas bien definidos o tonos que varíen constantemente para obtener resultados óptimos.
3Para una foto a escala de grises, con 5-6 tonos que cambian gradualmente de blanco/gris claro a gris oscuro/negro usualmente se logra un buen bordado.
3Para una foto a color sencilla, 7-10 colores pueden ser suficientes. Si un color ocupa más del 5% del área total, será incluido por defecto.
3Para una foto compleja con muchos colores diferentes, 14-16 colores pueden ser suficientes. Trate de limitar los colores a menos de 20 porque cada cambio de hilo cuenta.Try to limit colors to no more than 20 as every thread change counts.
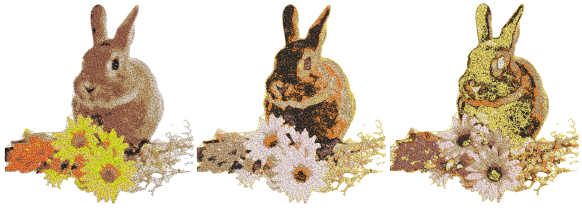
3Pruebe a pasar en ciclo los colores usados para observar efectos interesantes.
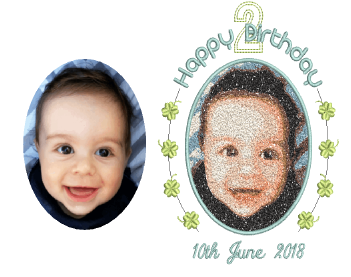
3Combine PhotoStitch a color con letras, orlas satín y motivos para crear suvenires atractivos.
3Limite la cantidad de redimensionamiento en EmbroideryStudio para mantener la mayor cantidad posible de información de la imagen. Si una imagen es demasiado grande para el propósito pensado, redimensiónela y reprocésela en una aplicación CorelDRAW® o de gráficos externa conectada antes de aplicarle técnicas de digitalización automática. Esto generalmente produce un resultado mejor.
3Aunque originalmente creado para usarse con fotografías, PhotoStitch a color puede también usar gráficos para crear bordados comercialmente atractivos.

3Preparar fotos para la digitalización automática
3Preparar ilustraciones para la digitalización automática
Productos
Complementos de EmbroideryStudio
Soluciones
Aprendiendo
|
Copyright ©2025 Wilcom Pty Ltd | Condiciones de uso | Política de privacidad |