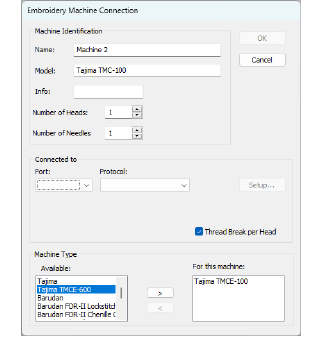
To set up a machine you need to define a name, the port it is attached to, and the protocol it uses. You can select whether to download automatically to the selected machine and – for machines that support serial feedback – whether to view design feedback as you stitch out. For every machine, you need to select the machine formats it supports. You can select from a selection of standard formats, or create new formats if necessary.
1Connect the embroidery machine using the instructions that came with the machine. Carefully note the port settings, which must also be entered in the Embroidery Machine Connection dialog.
2Start Machine Manager. See Running Machine Manager for details.
3Select Machine Manager > Add Machine. The Embroidery Machine Connection dialog opens.
4Adjust the available settings as required:
|
Field |
Details |
|
Name |
Enter a name for the machine – e.g. ‘Machine 1’. |
|
Model |
Enter the brand and model of the machine. |
|
Info |
Provide further machine details. |
|
Number of heads |
Enter the number of machine heads. |
|
Number of needles |
Enter the number of needles. |
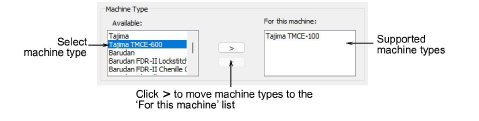
5In the Machine Type panel, select the compatible machine formats.
To do this, select compatible machine types in the Available list, and click > to move them to the For this machine list.
Note: Machine format values can be added or changed if required. See the EmbroideryStudio User Manual for details.
6From the Port dropdown list, select the port to which the machine is connected. See Adjust port settings below.
Products
EmbroideryStudio Add-ons
Solutions
Learning
About Wilcom
|
Copyright ©2025 Wilcom Pty Ltd | Terms of Use | Privacy Policy |