|
|
Use Sequin > Sequin Palette to select from a user-defined palette of sequin shapes for the current design. |
|
|
Use Sequin > Sequin Palette to select from a user-defined palette of sequin shapes for the current design. |
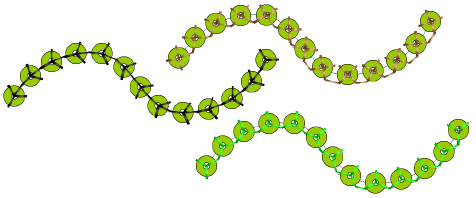
You can select sequins before or after digitizing. Similarly, you can preset fixing stitches or change them at any stage.

Tip: Digitizers sometimes want to generate a sequin run and overlay it with a plain run so that sequins are more securely fixed. Another reason for backtracking is to avoid jump stitches between objects. The Backtrack/Repeat tool is enabled for sequin-run objects. When applied, EmbroideryStudio generates manual stitches but leaves other functions unaffected. See also Controlling stitch direction.
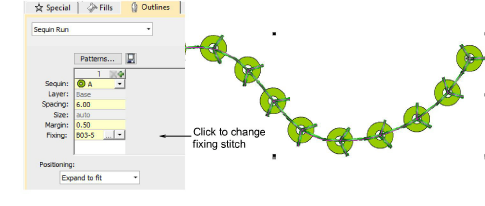
To change fixing stitches, double-click to access object properties.

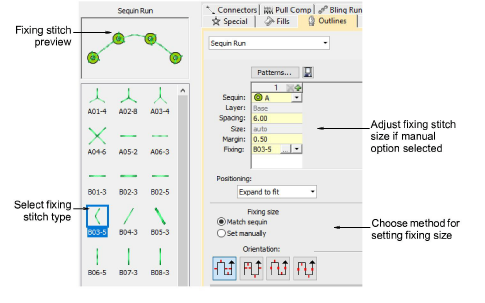
Click the Chooser button in the Fixing field. The docker expands to reveal a library of fixing stitch types.

Select the preferred type.

To adjust fixing stitch size, select a method:
|
Method |
Function |
|
Match sequin |
Automatically sets a margin around the sequin so that fixing stitches don’t punch too close. |
|
Set manually |
Enables the Size field and lets you set a fixing stitch size independent of sequin size. |
If you choose the manual option, specify a value in the Size field. Size is measured from the center of the sequin. Enter a value from 2.50mm to 30.00mm.

If you have chosen automatic matching, specify a margin for the fixing stitch in the Margin field. Enter a value from 0.20mm to 2.00mm. This ensures that the fixing stitch does not punch too close to the sequin.
If you have chosen an eccentric sequin shape such as ‘ellipse’, fixing stitches automatically adapt to fit.

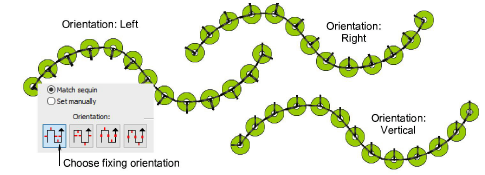
To adjust fixing orientation, choose one of the preset directions – left/right, up/down.
