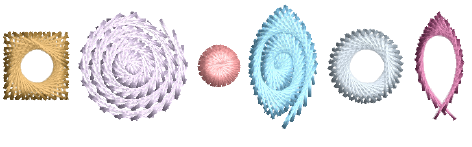
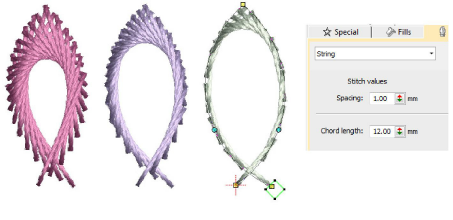
String Stitch has its origins in India where it is known as ‘Paghadi’. This is commonly used to hold down small mirrors in intricate fabric designs. String Stitch mimics the overlapping ‘string art’ of Paghadi stitching. It can also be used to secure mirrors or sequins. Or it can be used for decorative effects such filling leaf-like shapes with elongated stitching. It comes in two forms – outlines and fills – and can be applied to open or closed shapes.
Most String stitch effects can be achieved by quite simple means. Since stitch angles have no effect, you can digitize most shapes with simple tools such as Run or Complex Fill. String outline provides spacing and chord length settings for control of outline density and thickness. Reversing entry and exit points will also affect the direction of stitch overlaps.
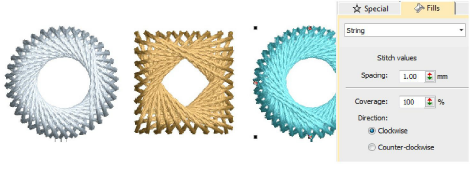
String fill provides a spacing setting for control of stitch density. Thickness is determined by the shape. Try using it with both closed objects and objects with holes such as Ring objects. Direction of stitch overlaps is controlled by the Direction setting.
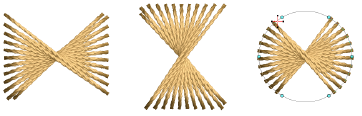
The Coverage setting can be used create partial covers such as the ones below. Control orientation either via the Direction setting or by changing entry/exit points.
|
Copyright ©2024 Wilcom Pty Ltd | Terms of Use | Privacy Policy |


