Another technique for deploying custom bead fixings is to save them as motifs and use them singly or in motif runs. Con la funzione Crea motivo puoi salvare i tuoi motivi da usare in un secondo momento. Custom motifs are saved in custom ‘motif sets’.

1Create your custom bead and fixing stitch or edit an existing one.

2Duplicate and align the motif as you want it to appear in a motif run. Use Alignment tools for precise arrangement.

3Once you have determined the layout, select objects and apply Closest Join. Usa il motivo di mezzo per definire punti di riferimento.
4Select the motif and choose Object > Create Motif.
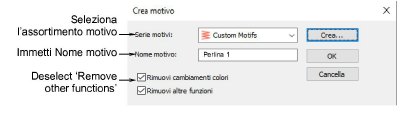
5Seleziona una serie motivi dalla lista a discesa ed immetti un nome nel campo Nome motivo.
6Deselect the Remove other functions option. This ensures that beads are preserved.
7Clicca OK.
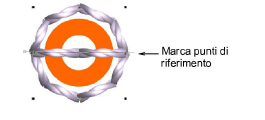
8Clicca per marcare due punti di riferimento per il motivo perlina. These should coincide with entry and exit points.
9Use you custom bead and fixing in bead runs or individual placements.

Prodotti
Componenti aggiuntivi di EmbroideryStudio
Soluzioni
Apprendimento
|
Copyright ©2023 Wilcom Pty Ltd | Condizioni d'uso | Informativa sulla privacy |

