Double-click to start EmbroideryHub.
|
|
Double-click to start EmbroideryHub. |
Use the following steps to connect EmbroideryHub to your machine.
1Launch EmbroideryHub on your computer.
2Go to the Connections tab.
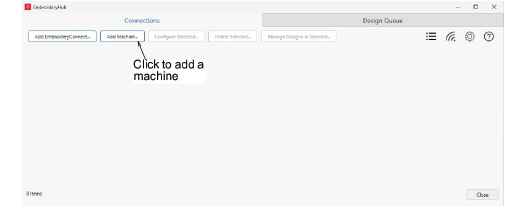
3Click Add Machine. EmbroideryHub will automatically search for machines on your network.
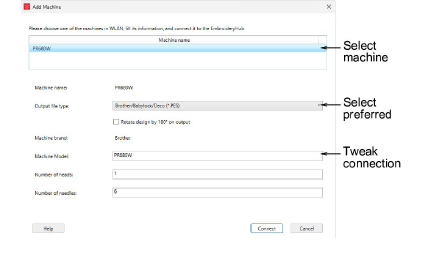
4From the list, select your machine – e.g. ‘PR680W’.
5Tweak your connection settings as necessary:
|
Option |
Function |
|
Machine name |
Read only: this name comes from the machine’s Wi-Fi setup. |
|
Output file type |
Specify the machine file type for the selected machine – e.g. *.PES. Design files will be converted on-the-fly to this format. |
|
Rotate design |
If the machine is dedicated to cap designs, tick this option. The design will be auto-rotated 180° on the machine. |
|
Machine brand |
Read only. |
|
Machine model |
Descriptive field only. |
|
Number of heads |
Descriptive field only. |
|
Number of needles |
Descriptive field only. |
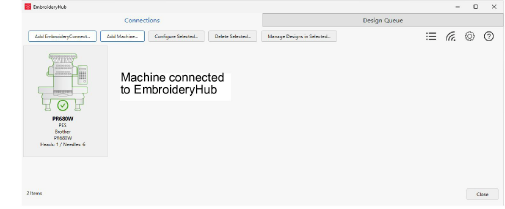
Click Connect to confirm the connection. Once added, your machine will appear in the Connections list in EmbroideryHub. You can now send designs to this device from EmbroideryStudio.
Note: EmbroideryHub needs to remain active at all times in order to send designs to connected devices.
If you are experiencing problems with your WLAN setup, check the following...
|
Problem |
Check... |
|
Machine not found |
|
|
Slow transfer |
Check your Wi-Fi signal strength on both your computer and the machine. |
|
Wrong machine showing |
Only supported models – e.g. PR680W, PR1055X, PR1060X – will connect. |
Products
EmbroideryStudio Add-ons
Solutions
Learning
Support
Connect
About Wilcom