
Use Standard > Send to Device/Machine to send the current design to a named EmbroideryConnect device via WLAN.
|
|
Use Standard > Send to Device/Machine to send the current design to a named EmbroideryConnect device via WLAN. |
Once you have configured one or more embroidery machines on your network, you can send designs to any named device from a computer running EmbroideryStudio on your local Wi-Fi network. You can also read designs from a connected machine into your EmbroideryStudio software.
1Open EmbroideryStudio and load the design or designs you want to send to device.
2Make sure EmbroideryHub is running and that any devices on the network have been properly configured.
Note: The EmbroideryHub PC must be connected to the same local Wi-Fi network as any connected devices.
3From the Standard toolbar, choose Send to Device/Machine. Alternatively, select the command from the File menu. The dialog will display a list of configured devices. Both connected and disconnected devices will be listed.
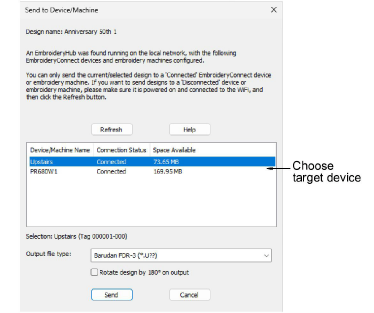
Tip: If you want to send a design to a ‘disconnected’ EmbroideryConnect device, ensure the embroidery machine is powered on and the device connected, then click the Refresh button.
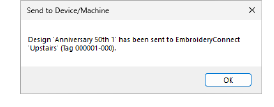
4Choose a connected EC device and click Send. The design will be automatically converted to the selected machine file format and sent to the device.
5Check the state indicator of your EC device.
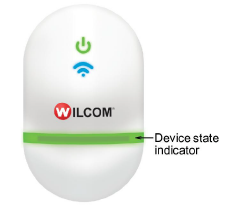
The following table explains the device state color coding…
|
Light color |
Device state |
|
Solid green |
Device is running smoothly. Designs can be sent to machine. |
|
Solid yellow |
Device is currently inaccessible by embroidery machine. |
|
Flashing yellow |
Device is currently inaccessible by embroidery machine and file being uploaded (design or firmware update file). |
|
Flashing orange |
There are two cases:
|
|
Flashing red |
Error occurred while transferring file. |
|
Flashing white |
Factory reset in progress. |
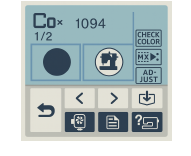
6On the machine, the EC device is recognized as a USB stick. From here, you can load the design into machine memory for stitching.
7Repeat for all designs you want to send. Only one file can be transferred at a time.
3Send designs to EmbroideryConnect device
3Managing designs on EmbroideryConnect
Products
EmbroideryStudio Add-ons
Solutions
Learning
Support
Connect
About Wilcom