Use Docker > Object Properties to preset properties or adjust properties of selected objects.
|
|
Use Docker > Object Properties to preset properties or adjust properties of selected objects. |
Buttonhole types can be changed at any time. They are simply properties of a buttonhole object. Other properties include ‘slit length’ which can be adjusted to suit button size.
3Double-click a buttonhole object to open Object Properties.
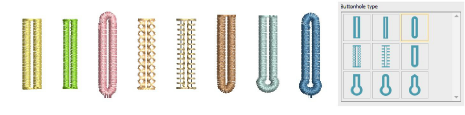
3Click to select a preferred type from the gallery.
3Adjust Slit length according to your button size.
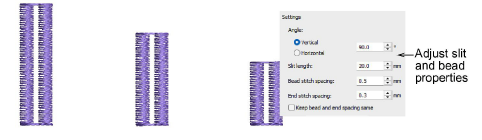
3Adjust stitch spacings as preferred. Different values are available for different buttonhole types. For some, independent settings are available for bead stitch and end stitch spacing. Otherwise, use the checkbox to keep bead stitch and end stitch spacing in sync.
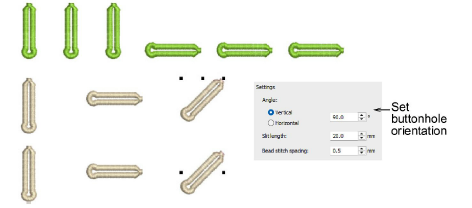
3Adjust buttonhole orientation as preferred.
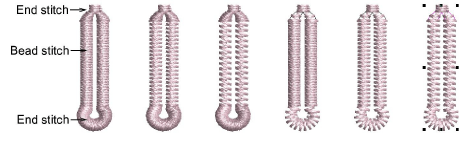
3Tight bead stitch spacing creates a smooth, corded effect. Good for fine fabrics – silk, cotton shirting – and high-stress buttonholes – coats, cuffs.
3Wider spacing produces a lighter, more flexible, less bulky effect. Better for thicker fabrics or decorative uses.
3Generally, stitches should sit just close enough that the fabric edge doesn’t show through, but not so close that they pile up into a ridge.
3On domestic sewing machines, the stitch length setting controls bead spacing:
3For fine fabrics: 0.3–0.5 mm spacing is common.
3For medium fabrics: 0.5–0.7 mm.
3For heavy fabrics: up to 1 mm can work to prevent stiffness.
3Sometimes a cord is laid along the slit, and the bead stitches are worked over it. This makes the bead stitch spacing appear tighter and adds durability.
3There are situations where independent control of end stitch spacing in buttonholes is useful. End stitches take a lot of stress and also determine how neat the buttonhole looks. Independent controls let you tune appearance, hand feel, strength, and production time for each fabric and button style.
Products
EmbroideryStudio Add-ons
Solutions
Learning
Support
Connect
About Wilcom