You create templates from designs containing the required objects and property settings. Simply save the design, or elements of it, as a template. Use custom templates to:
3Standardize embroidery for specific fabrics – e.g. Terry Toweling.
3Maintain brand consistency – colors, fonts, lettering styles.
3Simplify workflows for product types – caps, patches, uniforms.
In short, templates act as a foundation for efficient, consistent, and error-free embroidery.
1Start a new design or open an existing one.
2Adjust the property settings, styles, and effects as required.
3Add the objects and lettering to be included in the template. For instance, you may want to include sample lettering using different baselines. Simply overtype the sample text when using the template.
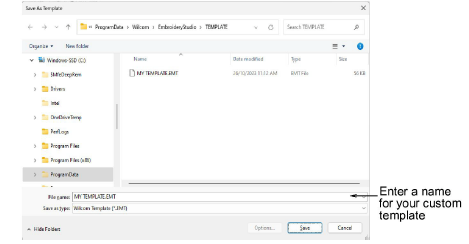
4Select File > Save As Template. The Save As Template dialog opens onto the Template folder.
Note: The dialog opens to this folder...
C:\ProgramData\Wilcom\EmbroideryStudio\TEMPLATE
Design templates must be saved here or they will not appear in the template list when you start a new design.
5Select Wilcom Template (EMT) from Save as type list.
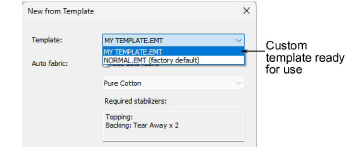
6Enter a name and click Save. The template is ready for use.
3Use short, descriptive names. Examples:
3Terry Toweling.EMT
3Corporate Branding.EMT
3Cap Logo.EMT
3Appliqué Patch.EMT
3Sports Mesh Fabric.EMT
3Team Name.EMT
3Inside each template, add a short text object or note describing what it’s for. This way, even if users forget the difference between templates, they’ll see guidance as soon as they open it.
3Save all custom templates in the TEMPLATE folder. For internal clarity, organize custom templates into a ‘Custom’ subfolder. EmbroideryStudio will still display them together, but internally they remain organized.
3The File menu provides separate commands for saving monogram and team name templates.
3Create designs from templates
Products
EmbroideryStudio Add-ons
Solutions
Learning
Support
Connect
About Wilcom