|
|
Use Efectos de puntada > Refuerzo automático para fortalecer y estabilizar los diseños de bordado con los refuerzos automáticos. Haga clic derecho para configuración. |
|
|
Use Efectos de puntada > Refuerzo automático para fortalecer y estabilizar los diseños de bordado con los refuerzos automáticos. Haga clic derecho para configuración. |
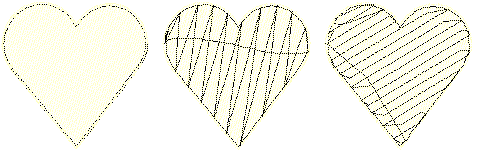
La herramienta Refuerzo automático activa/desactiva la aplicación de refuerzo automático a los objetos nuevos o seleccionados. El refuerzo se aplica por defecto. Use el botón de alternancia para desactivarlo cuando necesite. Por ejemplo, al aplicar un efecto, tal como el Relleno gradiente, probablemente deseará desactivar del todo el refuerzo.

Cuando está activado, las configuraciones de refuerzo predeterminadas se ajustan para acomodarse al tipo de puntada seleccionado y a la forma del objeto. El bordado de refuerzo posee configuraciones similares a las del bordado de cobertura excepto que el espaciado de puntada predeterminado es mucho más ancho.

Para formas diferentes y telas diferentes son apropiados refuerzos diferentes. Las áreas grandes y las telas que se estiren, como telas de punto o piqué, necesitarán generalmente más refuerzo que las áreas pequeñas y las telas firmes, como el cuero o el dril. Para los objetos más pequeños puede usarse una única capa de refuerzo. Para los objetos más grandes pueden combinarse dos capas.

Las configuraciones de refuerzo se almacenan con cada objeto del mismo modo que las demás propiedades del objeto. Se regeneran cada vez que se gradúa o transforma el objeto. Se almacenan por separado de, y no afectan, las configuraciones de puntada de cobertura.
Los valores de refuerzo predeterminados se derivan de tres fuentes posibles:
3Cuando Tela automática está habilitado, se aplica un refuerzo predeterminado con base en las configuraciones de la tela actuales.
3Cuando Tela automática está apagado y la opción ‘usar estilos preseleccionados’ está encendida, se usan las definiciones del estilo. Vea Digitalizar preseleccionados para más información.
3Cuando Tela automática está apagado y la opción ‘usar estilos preseleccionados’ está apagada, se usan los valores de la plantilla. Vea Trabajar con plantillas para más información.