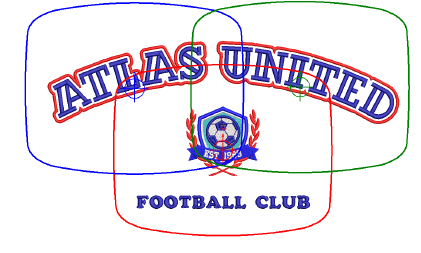
Recuerde que el número de encuadres que existen en un diseño con encuadres múltiples no necesariamente corresponde a la cantidad de archivos de producción. Todo depende de las capas de los objetos en el diseño. Para conservar la secuencia de bordado digitalizada, se puede tener que usar el mismo encuadre más de una vez. Los encuadres de aro se bordan consecutivamente para formar el diseño completo. Lo que sigue es una guía para bordar archivos con múltiples aros en la máquina.
1Abra el diseño grande con múltiples aros.

2Imprima la secuencia de encuadres. Los trazados grandes pueden imprimirse en impresoras de formato pequeño y luego ensamblarse. Esto configura todos los aros en la relación espacial correcta.
3Fije la impresión a la prenda. Elimine las partes innecesarias del trazado para aislar los encuadres individuales.
4Encuadre la tela (o la prenda) y borde el primer encuadre.. Las marcas de registro se bordan por último. Use el marcador de la posición del aro para ubicar y rotar la prenda usando la plantilla del aro físico.
5Retire la tela del aro.
6Encuadre un pedazo de estabilizador reforzado engomado y remueva el papel protector.
7Borde las marcas de registro el inicio del encuadre siguiente sobre el estabilizador.
8Alinee las marcas de registro recientemente bordadas con las marcas en el estabilizador y adhiera la tela sobre la superficie engomada. Para ayudar, inserte alfileres a través del centro de las marcas de registro.
9Borde el encuadre siguiente.
10Repita hasta completar el diseño.
3Es importante que su tela no se estire o deforme al bordar. Para lograr esto, debe tomar precauciones de encuadrado extras.
3Si usa tejido de punto, estabilícelo por el reverso primero para que no se estire..
3Use un estabilizador ‘sticky-back’ o un buen adhesivo spray. La mayoría recomiendan usar un estabilizador ‘sticky-back tear-away’, lo suficientemente pesado para que las marcas de registro no lo rompan.
3Use alfileres a través de las marcas de registro de un encuadre para alinear las marcas correspondientes del siguiente encuadre.