Cuando desea generar diseños con múltiples aros como archivos de máquina, usa la función Exportar archivo de máquina en la forma normal. Se le solicitará dividir el diseño en archivos separados para cada encuadre.
1Cree o abra su diseño con encuadres múltiples.
2Haga clic en el icono Exportar archivo de máquina. El diálogo aparece permitiéndole navegar a cualquier carpeta.
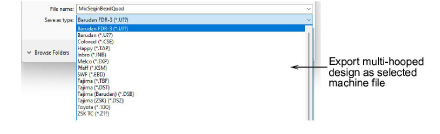
3Elija un tipo de archivo de máquina de la lista desplegable.
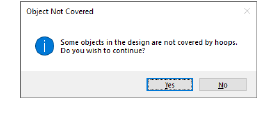
4Cambie el nombre del archivo exportado como requiera y elija una carpeta de destino. El sistema verifica que todos los objetos de bordado se encuentren cubiertos. Se le advertirá si no es así.
Todos los encuadres de aro que se necesitan para bordar un diseño se calculan y se muestran en el panel Secuencia de encuadres. Las encuadres se nombran como archivos con la extensión de archivo escogida. Las líneas de división aplicadas se calculan al producir y los objetos se dividen en sus encuadres respectivos.
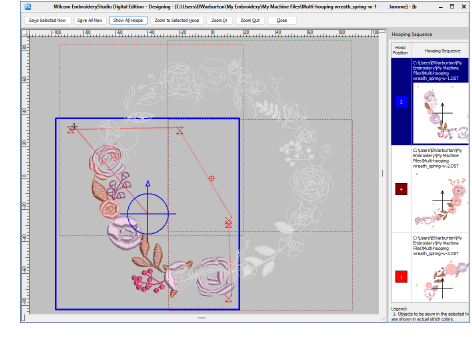
5Opcionalmente, haga Zoom al aro seleccionado para visualizar en detalle cada encuadre. Si usted activó las marcas de registro, podrá verlas claramente marcadas en rojo.
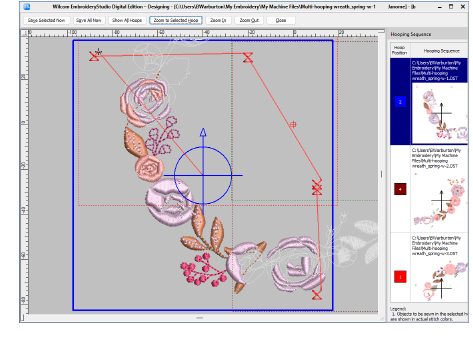
6Seleccione un encuadre de aro y haga clic en Guardar selección ahora. Como alternativa, haga clic sobre Guardar todo ahora para guardar todos los archivos en la lista. EmbroideryStudio saca las encuadres de aro a sus archivos individuales.
7Haga clic en Cerrar para regresar al modo anterior.
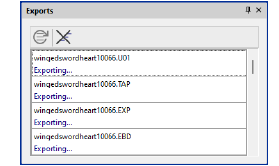
Idea: Haga clic en el botón de alternancia Exportaciones para abrir el panel acoplable Exportaciones. Este panel le permite visualizar el estado de exportación de la sesión actual. La conversión a formatos antiguos o a archivo de máquina se realiza como una tarea en segundo plano.
Productos
Complementos de EmbroideryStudio
Soluciones
Aprendiendo
|
Copyright ©2025 Wilcom Pty Ltd | Condiciones de uso | Política de privacidad |

