|
|
Haga doble clic para iniciar EmbroideryHub. |
|
|
Haga doble clic para iniciar EmbroideryHub. |
Configurar una red EmbroideryConnect es fácil…
3Se requiere un solo dispositivo para cada máquina de bordar.
3Un PC de red dedicado actúa como ‘núcleo’ y corre el software EmbroideryHub.
3Todos los dispositivos EmbroideryConnect se configuran en este PC.
3Todos los PCs secundarios acceden a la red EmbroideryConnect mediante el EmbroideryHub.
1Asegúrese de que el PC disponga de una conexión a Internet activa.
2Inicie EmbroideryHub en el grupo de programas o escritorio.

Cuando lo corre por primera vez, la lista de dispositivos en la ventana principal de EmbroideryHub está vacía.
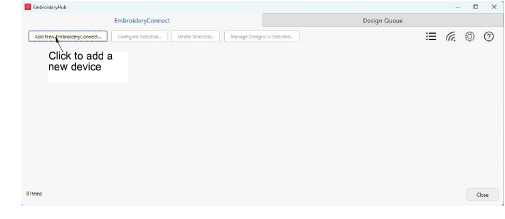
3Haga clic en Agregar nuevo EmbroideryConnect.
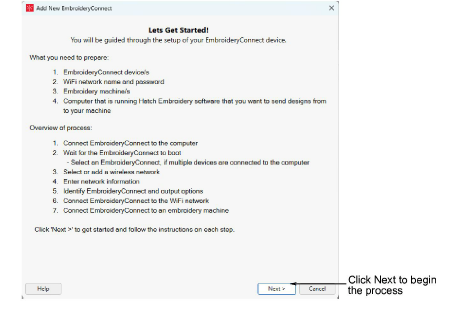
4Haga clic en Siguiente >. El siguiente diálogo aparece.
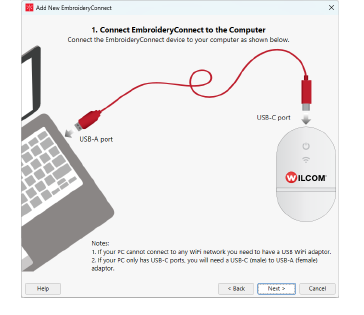
5Conecte su dispositivo EC al computador mediante el cable conectado al puerto USB-C del dispositivo.
6Haga clic en Siguiente >. El siguiente diálogo aparece.
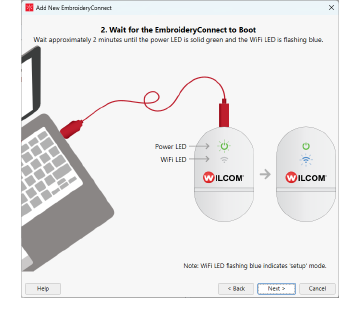
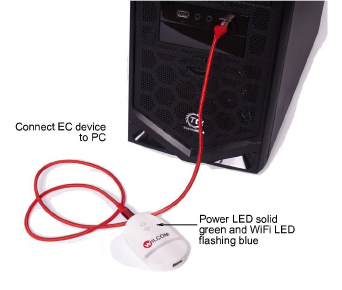
7Asegúrese de que todas las luces se encuentren en modalidad ‘Configuración’ como se le solicita. Cuando el LED de potencia está verde sólido y el LED WiFi está azul intermitente, el dispositivo ha terminado de iniciarse. Esto toma generalmente dos (2) minutos.
8Haga clic en Siguiente >. El siguiente diálogo aparece.
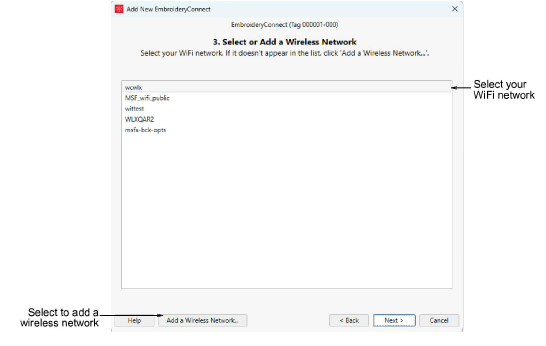
9Seleccione su red WiFi y haga clic en Siguiente. Si su red WiFi no aparece en la lista, seleccione el botón Añada una red inalámbrica...
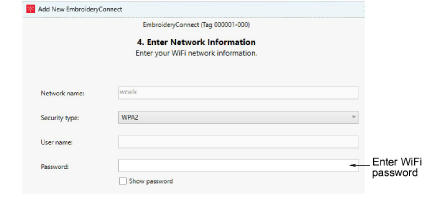
10Ingrese su contraseña WiFi y haga clic en Siguiente >.
11Identifique el dispositivo EC y especifique las opciones de producción.
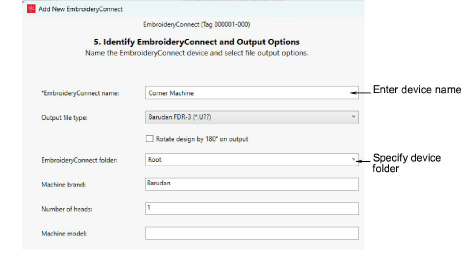
Las opciones incluyen:
|
Opción |
Función |
|
Nombre del dispositivo EmbroideryConnect |
Dele al dispositivo un nombre relacionado con la máquina conectada – p. ej. ‘Tajima #2’. |
|
Genere el tipo de archivo |
Especifique el tipo de archivo de máquina para la máquina seleccionada – p. ej. *.PES. Los archivos de diseño se convertirán sobre la marcha a este formato. |
|
Rotar el diseño |
Si la máquina está dedicada a diseños de gorra, marque esta opción. El diseño se rota automáticamente 180° en la máquina. |
|
Carpeta del dispositivo EmbroideryConnect |
Especifique la carpeta en el dispositivo si es diferente a la carpeta ‘raíz’. Los requisitos de máquina son los mismos que aquellos para enviar un diseño mediante un dispositivo USB normal. |
|
Marca de la máquina |
Este campo es descriptivo para ayudar a identificar la máquina asociada al dispositivo EC. |
|
Número de cabezales |
Campo solo para descripción |
|
Modelo de máquina |
Campo solo para descripción |
12Haga clic en Conectar para proceder. Aparece el siguiente diálogo de confirmación.
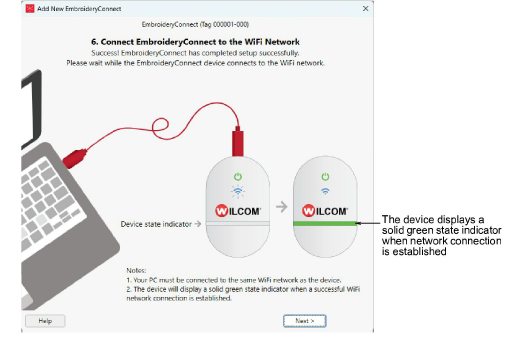
13Espere a que el dispositivo EC se conecte a la red. La conexión toma alrededor de 15 segundos dependiendo del tráfico en la red.
14Haga clic en Siguiente > para continuar. Aparece el siguiente diálogo.
15Haga clic en Terminar para cerrar el diálogo Añadir un EmbroideryConnect nuevo.
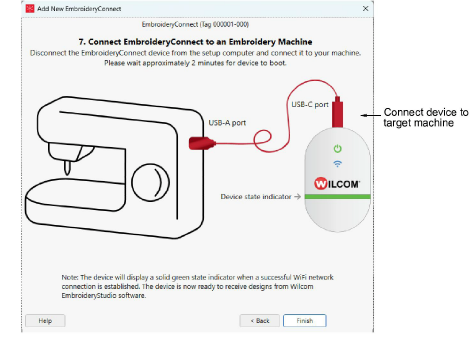
16Elimine el cable del computador EmbroideryHub y conéctelo a la máquina objetivo en la misma red WiFi.
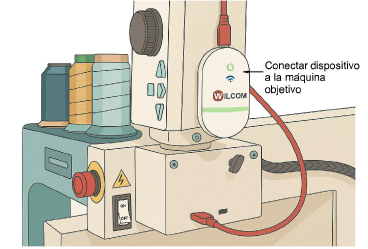
Idea: El dispositivo EC viene con bandas de montaje 3M para adherirlo a la máquina.
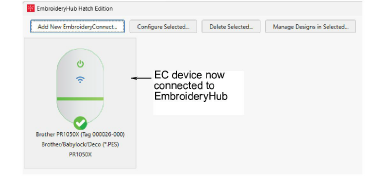
17Espere a que el dispositivo EC se conecte a la red. La conexión toma alrededor de 15 segundos dependiendo del tráfico en la red. El LED WiFi azul destellará y se volverá azul sólido cuando se haya conectado satisfactoriamente.
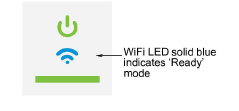
Puede ahora enviar diseños a este dispositivo desde EmbroideryStudio.
Nota: El EmbroideryHub debe permanecer activo en todo momento para enviar los diseños a los dispositivos conectados.
Productos
Complementos de EmbroideryStudio
Soluciones
Aprendiendo
|
Copyright ©2025 Wilcom Pty Ltd | Condiciones de uso | Política de privacidad |
