|
|
Use Caja de herramientas > Contornos y desplazamientos para crear contornos y desplazamientos de cualquier clase para cualquier bordado relleno u objeto vectorial cerrado. |
|
|
Use Caja de herramientas > Contornos y desplazamientos para crear contornos y desplazamientos de cualquier clase para cualquier bordado relleno u objeto vectorial cerrado. |
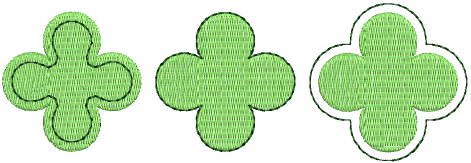
La herramienta Contornos y desplazamientos le permite especificar desplazamientos tanto negativos como positivos.
1Seleccione objeto/s fuente y haga clic en el icono Contornos y desplazamientos.
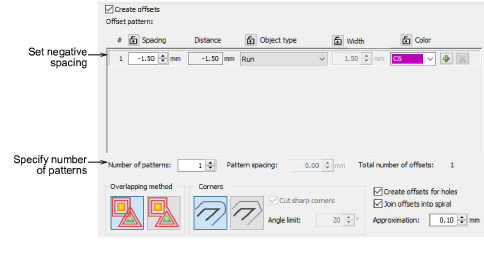
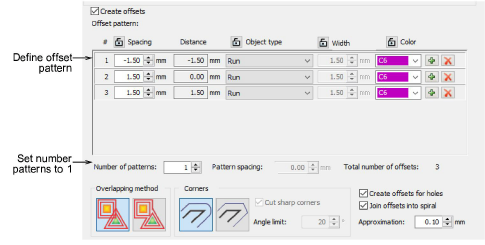
2Marque Crear desplazamientos y defina un objeto de desplazamiento simple en el panel Patrón de desplazamiento.
3Introduzca el desplazamiento requerido en milímetros.
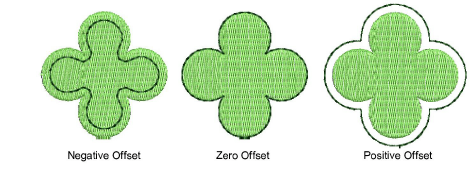
3Para centrar el objeto de desplazamiento sobre el original, introduzca un valor 0.00.
3Para posicionar el objeto desplazado fuera del original, introduzca un desplazamiento positivo p. ej., 1.00.
3Para posicionar el objeto desplazado dentro del original, introduzca un desplazamiento negativo p. ej., -1.00.
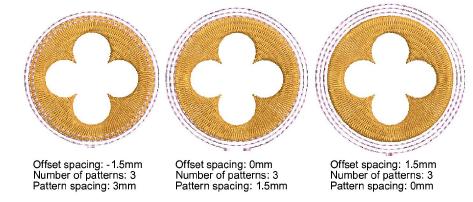
4Si usted desea desplazamientos simples, introduzca un valor en el campo Número de patrones.
5Seleccione Espaciado de patrón e introduzca el desplazamiento requerido en milímetros. Los desplazamientos siempre son desplazados en una dirección positiva, incluso si usted ha introducido un número negativo. El espaciado se calcula desde el objeto precedente, no desde el objeto fuente.
Nota: Como alternativa a la técnica anterior, puede definir sus desplazamientos negativos como un único patrón de desplazamiento. Tenga en cuenta como configura los espaciados.
Productos
Complementos de EmbroideryStudio
Soluciones
Aprendiendo
|
Copyright ©2025 Wilcom Pty Ltd | Condiciones de uso | Política de privacidad |
