|
|
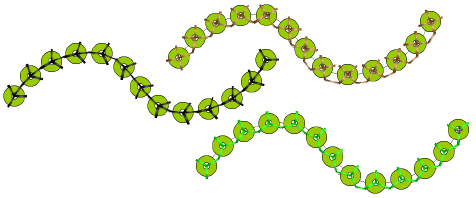
Use Lentejuelas > Paleta de lentejuelas para seleccionar desde una paleta de formas de lentejuela definidas por el usuario para el diseño actual. |
|
|
Use Lentejuelas > Paleta de lentejuelas para seleccionar desde una paleta de formas de lentejuela definidas por el usuario para el diseño actual. |
Puede seleccionar lentejuelas antes o después de digitalizar. Del mismo modo, puede predefinir puntadas de fijación o cambiarlas en cualquier etapa.
Idea: Los digitalizadores a veces desean generar un corrido de lentejuelas y recubrirlo con un corrido sencillo para sujetar las lentejuelas más firmemente. Otra razón para repasar con corrido sencillo es evitar puntadas de salto entre objetos. La herramienta Retroceder/Repetir está activada para objetos con corrido de lentejuela. Cuando se aplica, EmbroideryStudio genera puntadas manuales pero no afecta otras funciones. Vea también Reforzar contornos.
1Para cambiar las puntadas de fijación, haga doble clic para acceder a las propiedades del objeto.
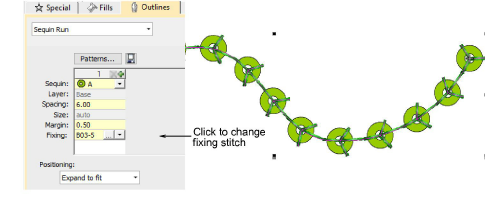
2Hagan clic en el botón Selector en el campo Fijación. El panel acoplable se expande para revelar una biblioteca de tipos de puntadas de fijación.
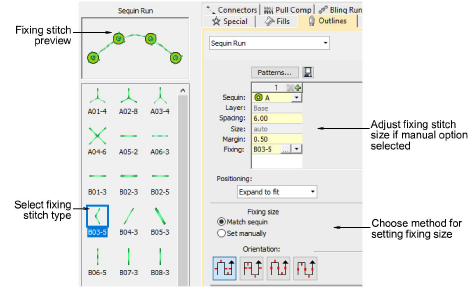
3Seleccione el tipo preferido.
4Seleccione un método para ajustar el tamaño de la puntada de fijación:
|
Método |
Función |
|
Casar con lentejuela |
Establece automáticamente un margen alrededor de la lentejuela para que las puntadas de fijación no perforen demasiado cerca de la lentejuela. |
|
Establecer manualmente |
Habilita el campo Tamaño y permite definir un tamaño de puntada de fijación independiente del tamaño de lentejuelas. |
5Si escoge la opción manual, especifique un valor en el campo Tamaño. El tamaño se mide desde el centro de la lentejuela. Ingrese un valor de 2.50 mm a 30.00 mm.
6Si escoge case automático, especifique un margen para la puntada de fijación en el campo Margen. Ingrese un valor entre 0.20 mm a 2.00 mm. Esto asegura que la puntada de fijación no perfore demasiado cerca a la lentejuela.
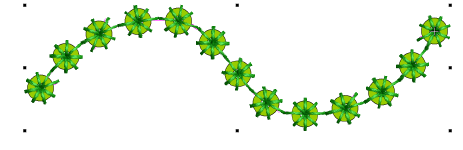
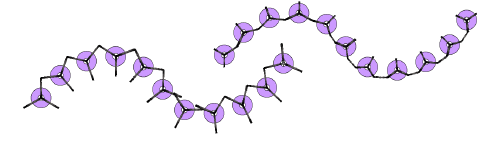
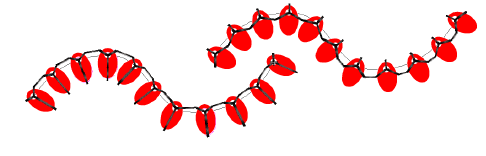
7Si ha escogido un tipo de lentejuela excéntrica como ‘elipse’, las puntadas de fijación se adaptarán automáticamente.
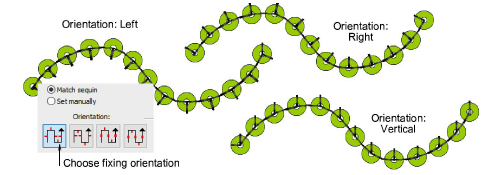
8Para ajustar la orientación de fijación, elija una de las direcciones preestablecidas: izquierda / derecha, arriba / abajo.
3Crear fijaciones de lentejuela
Productos
Complementos de EmbroideryStudio
Soluciones
Aprendiendo
|
Copyright ©2025 Wilcom Pty Ltd | Condiciones de uso | Política de privacidad |
