Los canutillos de bordan normalmente de último, después de los motivos y del resto del bordado. Con las herramientas Corrido de canutillos tiene la opción de digitalizar descargas de canutillos individuales o dejar que el sistema se los genere. Los corridos de canutillos automáticos se pueden redimensionar.
1Seleccione una máquina habilitada para canutillos en el diálogo Seleccionar formato de máquina.
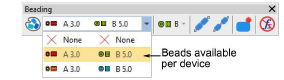
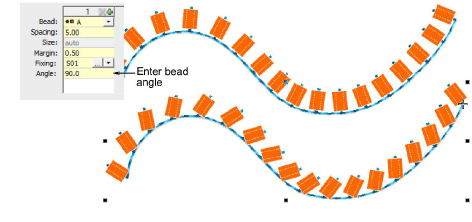
2Defina su paleta y seleccione las formas de canutillos que desea usar en la lista desplegable, en este caso una configuración de canutillo gemelo.
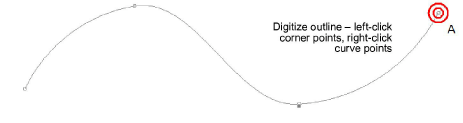
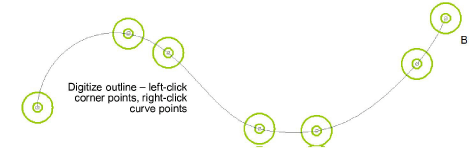
1Para digitalizar un corrido de canutillo redimensionable, use la herramienta Corrido de canutillos automático. Introduzca puntos de referencia – haga clic izquierdo para puntos de esquina, clic derecho para puntos de curva.
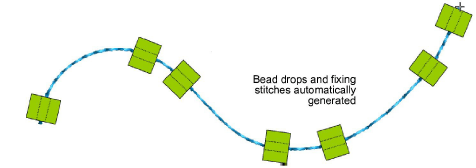
2Pulse Intro para completar. Las descargas de canutillo se generan automáticamente junto con las puntadas de fijación según las propiedades actuales del objeto Corrido de canutillos.

Idea: Puede convertir objetos un corrido normal en corrido de canutillos seleccionando y haciendo clic en la herramienta Corrido de canutillos automático.
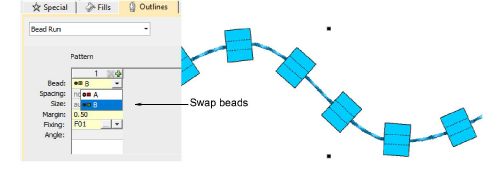
3Haga doble clic en el objeto para acceder a las propiedades e intercambiar canutillos como prefiera.
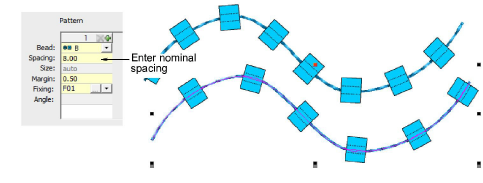
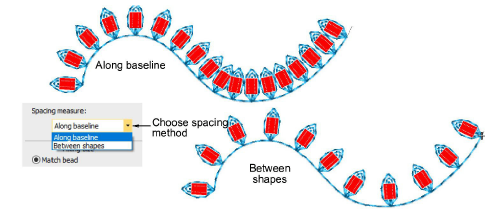
4En el campo Espaciado, ingrese un espaciado nominal. Por defecto, se mide ‘a lo largo de la línea de base’, desde una descarga de canutillos a la siguiente. El espaciado mínimo se calcula automáticamente.
5Ajuste el método de Posicionamiento como prefiera:
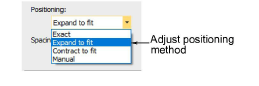
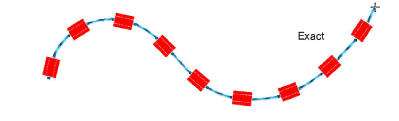
3Exacto: Usa el espaciado nominal. Esto puede dar lugar a la formación de una brecha al final del recorrido.
3Expandir hasta encajar: Expande el espaciado para distribuir uniformemente los canutillos.

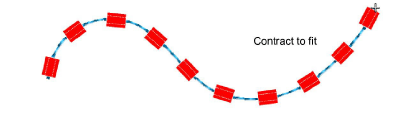
3Contraer hasta encajar: Contrae el espaciado para distribuir uniformemente los canutillos, a veces usando un canutillo extra.
3Manual: Convierte el corrido de canutillo en ‘manual’ de forma que el número de canutillos no cambie al redimensionar.
6Cambie la Medida del espaciado como necesario para evitar el amontonamiento de los canutillos.
7Use Ángulo para orientar los canutillos en relación con la línea del corrido. Las puntadas de fijación se ajustan en conformidad.
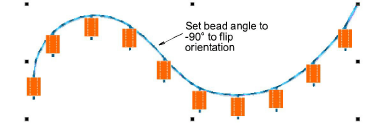
8Establezca el Ángulo en -90° para invertir la orientación del canutillo.
9Para cambiar las puntadas de fijación, haga clic en el botón ‘...’ en el campo Fijación. El panel desplegable se expande para mostrar una biblioteca de tipos de puntada de fijación. Véase más adelante.
1Para controlar el exacto posicionamiento de sus descargas de canutillos, use la herramienta Corrido de canutillos manual. Digitalice descargas de canutillos individuales con clics izquierdos y derechos del ratón.
2Pulse Intro para completar. Las descargas de canutillo se generan en cada punto de referencia. Las puntadas de conexión y de fijación se generan automáticamente.
Nota: Las colocaciones manuales pueden modificarse escogiendo un método diferente de Posicionamiento. Si cambia a espaciado exacto, todas las descargas se calculan de nuevo y las colocaciones manuales se pierden.
Productos
Complementos de EmbroideryStudio
Soluciones
Aprendiendo
|
Copyright ©2025 Wilcom Pty Ltd | Condiciones de uso | Política de privacidad |


