Tiene completo control sobre la edición de objetos de corrido de canutillos, desde redimensionar a eliminar canutillos específicos. Puede también afinar manualmente el espaciado y la orientación de los canutillos. Incluso puede editar puntadas de fijación individuales.
Idea: Al ejecutar ediciones manuales el posicionamiento de los canutillos se establece automáticamente en Manual. Si lo restablece en Exacto, Contraer hasta encajar, o Expandir hasta encajar, se pierden todas las ediciones manuales.
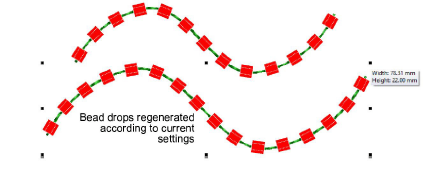
1Redimensione los objetos de corrido de canutillos haciendo clic y arrastrando las manijas de selección, o ajustando las propiedades generales.
3Con los objetos Corrido de canutillos automático, las descargas de canutillo se recalculan automáticamente.
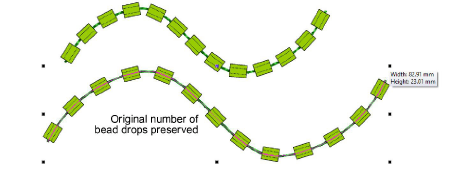
3Con los objetos Corrido de canutillos manual, se conserva el número original de descargas de canutillos al aumentar el espaciado.
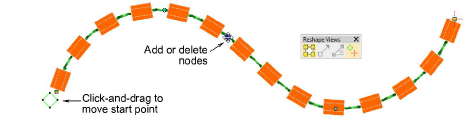
2Edite los corridos de canutillo con Reformar:
3Añada nodos haciendo clic izquierdo o derecho en el contorno.
3Para eliminar un nodo, seleccione y pulse Eliminar.
3Haga clic y arrastre para mover el punto de inicio. Para reversar la dirección de puntada, use Editar > Reversar > Reversar curvas.
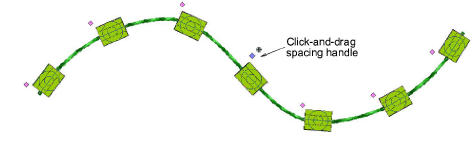
3Afine individualmente el espaciado de canutillos con la herramienta Editar canutillos. Haga clic y arrastre en un punto de control de rombo. Mantenga pulsadas la tecla Máyus o Ctrl para seleccionar un rango o múltiples puntos de control.
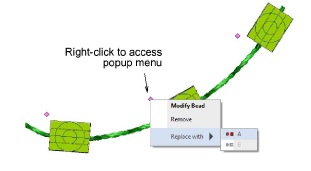
4Elimine los canutillos seleccionados pulsando Eliminar o mediante el menú emergente. Use el mismo menú para remplazar canutillos individuales en la paleta actual.
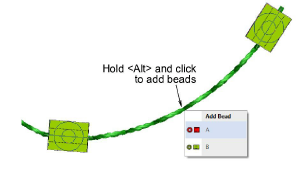
5Añada canutillos del menú emergente manteniendo pulsada la tecla Alt y haciendo clic en el corrido de canutillos.
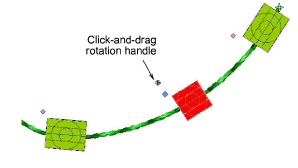
6Para girar un canutillo individual, haga clic en el punto de control de rombo. Use la manija de rotación para orientar el canutillo como necesite.
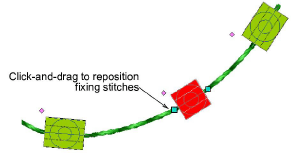
7Haga clic en el canutillo para activar las puntadas de fijación. Use las manijas para afinar como necesite
Productos
Complementos de EmbroideryStudio
Soluciones
Aprendiendo
|
Copyright ©2025 Wilcom Pty Ltd | Condiciones de uso | Política de privacidad |


