|
|
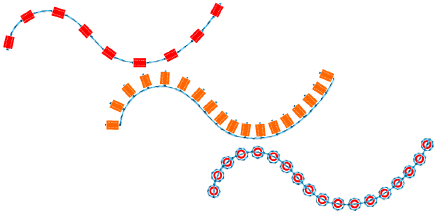
Use Canutillos > Paleta de canutillos para seleccionar canutillos en una paleta de formas de canutillo definidas por el usuario para el diseño actual. |
|
|
Use Canutillos > Paleta de canutillos para seleccionar canutillos en una paleta de formas de canutillo definidas por el usuario para el diseño actual. |
Puede seleccionar canutillos antes o después de digitalizar. Del mismo modo, puede predefinir las puntadas de fijación o cambiarlas en cualquier momento.
1Haga doble clic en un objeto seleccionado para acceder a propiedades del objeto.
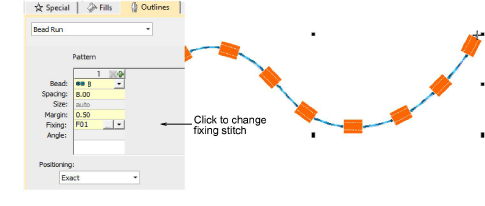
2Haga clic en el botón ... en el campo Fijación. El panel desplegable se expande para mostrar una biblioteca de tipos de puntada de fijación.
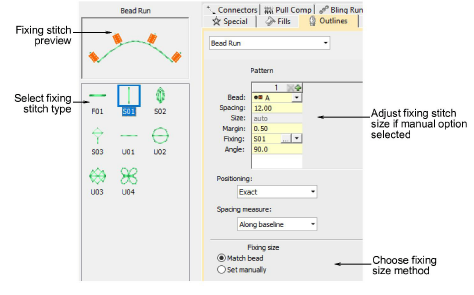
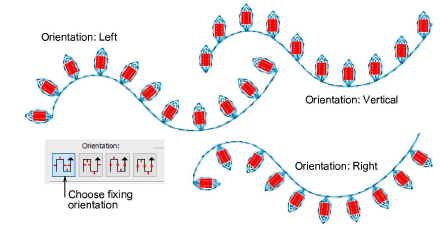
3Seleccione el estilo de anclaje preferido – ‘vertical’, ‘plano’, ‘lateral’.
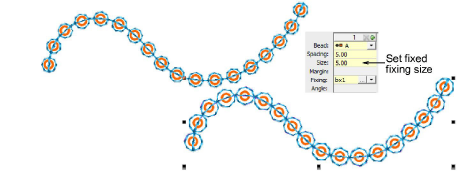
4Para ajustar el tamaño de la puntada de fijación, seleccione un método:
|
Método |
Función |
|
Casar canutillo |
Establece automáticamente un margen alrededor del canutillo de forma que las puntadas de fijación no se perforen demasiado cerca. |
|
Definir manualmente |
Activa el campo Tamaño y le permite definir un tamaño de puntada de fijación independientemente del tamaño del canutillo. |
3Si escoge la opción manua l’definir manualmente’, especifique un valor en el campo Tamaño. El tamaño se mide desde el centro del canutillo. Ingrese un valor entre 2.50 mm y 30.00 mm.
3Si escoge case automático, especifique un margen para la puntada de fijación en el campo Margen. Ingrese un valor entre 0.20 mm y 2.00 mm. Esto asegura que la puntada de fijación no se perfore demasiado cerca al canutillo.
5Para ajustar la orientación de la fijación, escoja una de las direcciones predefinidas – izquierda/derecha, arriba/abajo.
3Crear fijaciones de lentejuela
Productos
Complementos de EmbroideryStudio
Soluciones
Aprendiendo
|
Copyright ©2025 Wilcom Pty Ltd | Condiciones de uso | Política de privacidad |
