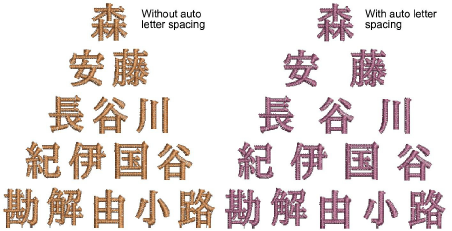
La prestación Espacio entre letras automático permite afinar los espacios entre las letras de acuerdo a la cantidad de carácteres en un objeto de letra. Al activarse, EmbroideryStudio aplica los espacios entre las letras de manera automática de acuerdo con la tabal de espaciado. Por ejemplo, en un objeto de letras de cinco carácteres, se pueden establecer espacios de 2mm, mientras que en un objeto de letras de tres carácteres, se pueden incrementar a, digamos, 3mm.
1Cree o seleccione un objeto de letras y haga doble clic para acceder a las propiedades del objeto.
2Seleccione una línea de base para usar con Espacio entre letras automático. El espacio entre letras automático se encuentra disponible para todas las líneas de base. Sin embargo, con líneas de base de línea fija y de arco, el espaciado automático sólo funciona con las opciones Anchura y Tamaño seleccionadas.
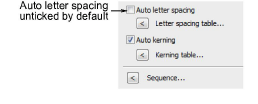
3Marque la casilla de verificación Espacio entre letras automático.
4Haga clic en el botón Tabla del espacio entre letras. El diálogo Tabla de espaciado entre letras contiene una matriz de configuraciones de espaciado para los objetos de letras de dos a seis o más carácteres.
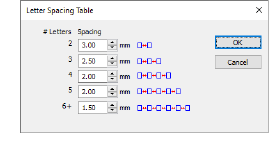
5Ajustar los espacios para cada grupo de carácteres. El campo de más arriba para dos carácteres tndra una gama de of 0.10mm a 100.00mm.
6Haga clic en Aceptar. Con la casilla de verificación Espacio entre letras automático marcada:
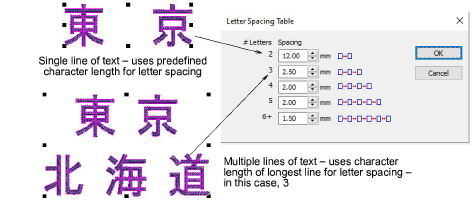
3Para un objeto de letras con más de una línea de texto, el sistema usará la línea de texto más larga para el espaciado entre las letras.
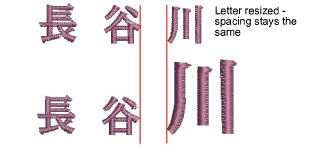
3La tabla del espacio entre letras no cambiará aunque se cambie el tamaño de las letras en la modalidas Reformar.
Idea: La prestación Espacio entre letras automático tambien funciona con la prestación Nombres de equipo. Cualquier ‘nombre’ puede tener espacios determidados entre las letras, así como se le puede también asignar cualquier otra propiedad de letras.
3Configurar el kerning automático de letras
3Crear diseños de nombres de equipo sencillos
Productos
Complementos de EmbroideryStudio
Soluciones
Aprendiendo
|
Copyright ©2025 Wilcom Pty Ltd | Condiciones de uso | Política de privacidad |